In the digital age, video content has become an integral part of communication and marketing strategies for individuals and businesses alike. Whether you're producing a promotional video, a tutorial, a short film, or any other type of video content, careful planning and execution are key to achieving a successful outcome. In this article, we'll delve into the essential steps to plan and execute a successful video shoot, complete with subheadings and live examples to illustrate each point.
1. Define Your Objectives and Audience
Before you even pick up a camera, it's crucial to define the objectives of your video shoot. What do you want to achieve with this video? Are you trying to educate, entertain, promote, or inspire? Once you have a clear understanding of your objectives, identify your target audience. Understanding your audience's preferences, interests, and needs will help shape the content and tone of your video.
Example: Let's say you're a fitness instructor creating a workout tutorial video. Your objective is to educate your viewers on proper workout techniques and motivate them to stay active. Your target audience would likely be individuals interested in fitness and looking for effective exercise routines.
2. Craft a Compelling Storyline
Every successful video tells a story, no matter how short or long it is. A compelling storyline keeps viewers engaged and invested in your content. Structure your video with a clear beginning, middle, and end. Introduce a conflict or challenge early on and then show how it's resolved. This structure helps maintain viewer interest and provides a sense of satisfaction.
Example: Imagine you're creating a promotional video for a travel agency. Start with a traveler who is feeling stressed and overwhelmed. Show them researching destinations, booking with your agency, and finally experiencing a relaxing and enjoyable vacation. The resolution of the traveler's stress creates an emotional connection with the audience.
3. Develop a Detailed Shot List and Storyboard
Planning the visual aspects of your video is essential. Create a shot list that outlines each scene, camera angle, and shot type you'll need. This list serves as a roadmap for your shoot, ensuring you capture all necessary footage. Additionally, create a storyboard to visualize how each shot will flow from one to the next. This step helps you identify potential issues and refine your creative vision.
Example: Suppose you're producing a cooking tutorial video. Your shot list might include close-up shots of ingredients being chopped, pans sizzling, and the final plated dish. Your storyboard would outline the sequence of shots from the chef's perspective, starting with gathering ingredients and ending with presenting the finished dish.
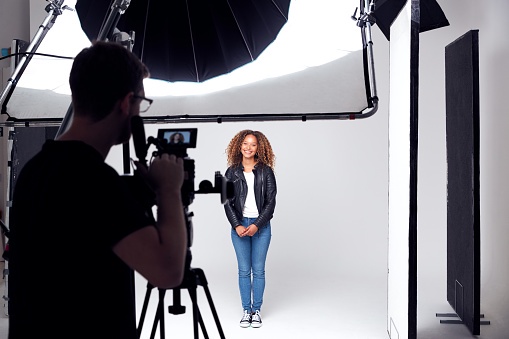
4. Choose the Right Equipment
Selecting the appropriate equipment is vital to achieving high-quality results. Consider factors such as the type of video you're creating, the shooting environment, and your budget. Cameras, lenses, microphones, lighting equipment, and stabilizers are all essential components to ensure professional-looking footage and clear audio.
Example: If you're filming an interview with an expert for an educational video, you might use a DSLR camera with a prime lens for a sharp focus on the subject. A lapel microphone could be used for clear audio, and softbox lights can provide a well-lit and controlled environment.
5. Scout Locations and Prepare the Set
The location where you shoot plays a significant role in the visual appeal of your video. Scout potential locations to ensure they align with your vision and logistical needs. Additionally, prepare the set by arranging props, decorations, and any necessary equipment ahead of time. A well-prepared set minimizes disruptions during filming and allows you to focus on capturing great content.
Example: Suppose you're shooting a music video for a band. You've scouted a gritty urban alley as one of your locations. To prepare the set, you might need to clean up the area, add some graffiti or street art for visual interest, and set up your camera and lighting equipment.
6. Nail the Technical Aspects
During the shoot, attention to technical details is essential. Focus on framing your shots correctly, maintaining proper exposure, and ensuring crisp audio. Take test shots and listen to audio samples before filming to catch any issues before they become problems. Shooting in the highest resolution and frame rate your equipment allows gives you flexibility during post-production.
Example: If you're shooting a short film, pay close attention to the framing of each shot. Use the rule of thirds to compose visually appealing images, and be mindful of lighting changes that might affect exposure as the characters move through the scene.
7. Capture B-Roll and Cutaway Shots
B-roll footage consists of supplementary shots that add depth and context to your video. These shots can include close-ups of details, wide shots of the environment, or shots of people's reactions. B-roll enhances storytelling and keeps the viewer engaged.
Example: Let's say you're creating a documentary-style video about a local artisan baker. While interviewing the baker, capture B-roll shots of hands kneading dough, loaves of bread coming out of the oven, and customers enjoying pastries in the bakery.
8. Conduct Multiple Takes and Interviews
For scripted content or interviews, multiple takes are often necessary to capture the best performance and ensure you have options during editing. Encourage your subjects to relax and be themselves, as authentic reactions and dialogue enhance the overall quality of the video.
Example: During an interview with a community leader for a nonprofit video, conduct multiple takes to allow the interviewee to express their thoughts naturally. This approach ensures you have different angles and responses to choose from during the editing process.
9. Review and Select Footage
Once you've wrapped up shooting, review all your footage. Make notes about the best takes, angles, and moments. This step is critical for streamlining the editing process and making informed decisions about which shots to include in the final video.
Example: After shooting a fashion lookbook video, review all the footage to identify the shots that best showcase the clothing and accessories. Take note of any shots that have lighting issues, focus problems, or other technical concerns.
10. Edit with Precision
The editing process brings your vision to life. Use professional video editing software to piece together your shots, add transitions, music, graphics, and any necessary effects. Maintain a cohesive flow and pace that aligns with your storyline and keeps viewers engaged.
Example: For a travel vlog, edit the footage of the vacation into a captivating sequence. Trim unnecessary moments, add upbeat music, and incorporate text overlays to highlight key destinations and experiences.
11. Seek Feedback and Iterate
Before finalizing your video, seek feedback from trusted colleagues or friends. Constructive criticism can provide fresh perspectives and help you identify areas for improvement. Be open to making changes based on the feedback you receive.
Example: After editing a corporate training video, share it with a few colleagues to gather their input. They might suggest adding more visual examples or shortening certain sections to maintain viewer attention.
12. Optimize for Distribution Platforms
Different platforms have varying requirements for video content. Whether you're uploading to YouTube, social media, or your website, ensure your video meets the platform's specifications. Optimize the video's title, description, and tags to enhance discoverability.
Example: If you're creating a product demo video for Instagram, be mindful of the platform's vertical format. Frame your shots accordingly and consider using engaging captions to convey key information even when viewers have their sound muted.
13. Engage Your Audience and Monitor Analytics
After your video is live, engage with your audience by responding to comments and encouraging discussions. Monitor analytics to assess the video's performance. Pay attention to metrics like view count, watch time, engagement rate, and audience demographics. Use this data to refine your future video strategies.
Example: For a tutorial video on painting techniques, respond to viewer comments by providing additional tips or answering questions. If you notice that viewers are dropping off halfway through the video, consider adjusting the pacing or adding more engaging visuals.
Conclusion
Planning and executing a successful video shoot is a multifaceted process that requires careful consideration of objectives, audience, creative elements, technical aspects, and post-production. By following the steps outlined in this article and learning from the provided examples, you'll be well-equipped to create compelling and impactful video content that resonates with your target audience. Remember that practice and continuous improvement are key to mastering the art of video production.
For more Information Visit:
Website: https://www.rinteger.com/
Email: marketing@rinteger.com
Phone Number : (+91) 9035671666

No comments yet