Zendesk is one of the world-leading customer service software used by various organizations across different industries to manage their help desk virtually and deliver a first-class customer service experience to their users. Data from interactions with customers such as ticket metrics, agents or user information, satisfaction ratings, and so on are quite valuable to building comprehensive reports needed to make data-driven decisions.
The best way to perform an in-depth analysis of Zendesk data is by using a Business intelligence tool like Power BI. Zendesk does not offer native integration with Power BI. Although there are a few workarounds, the best way to get data from your Zendesk to Power BI is by using a Power BI Zendesk Connector.
In this article, we talk about how this integration works and provides a step-by-step guide on how to connect Zendesk to Power BI.
Zendesk Reports in Power BI Main Advantages
As a cloud-based customer service platform, Zendesk helps organizations to unify all their customer interactions in a single place. Consequently, it can also serve as a single source of truth to get a clear and complete picture of interactions between your customers and your team. The ultimate goal is to deliver better customer service based on your in-depth analysis and make better data-driven business decisions.
Track Team Performance
Not only does Zendesk help you to manage the activities of your sales or customer service team, but it also tracks valuable data about team performance and workload. When you connect Zendesk as a data source to your Power BI, you gain valuable insights and contribute to the team with reliable information by analyzing ticket metrics, comments, satisfaction ratings, and so on.
Widen Data Landscape
For businesses already using Power BI to build comprehensive reports and make data-driven decisions, adding Zendesk data to your existing data pool can improve the quality of your reports. Zendesk is an informative data source that gives you a clear picture of your customer interaction. Combining Zendesk data with other data sources in Power BI you centralize insight to create complete and accurate reports for further analysis.
Analyze Data in Real-Time
Connecting Zendesk to Power BI makes real-time data analytics possible. Keep your Zendesk data up-to-date at all times by automatically loading it to your Power BI Desktop with a scheduled refresh.
Power BI Connector for Zendesk Overview
Alpha Serve is a professional software development company that specializes in creating enterprise-grade connectors that aid the seamless exports of data from business tools like ServiceNow, Zendesk, Shopify, Jira, and other Atlassian products to business intelligence platforms like Power BI.
Alpha Serve’s Power BI Connector for Zendesk is an enterprise-grade plugin that allows users to connect Zendesk to Microsoft Power BI for Zendesk extract data automation. This way, they can export Zendesk data seamlessly and build complex reports in Power BI without the need for complex coding or complicated workarounds.
The easy-to-use Power BI Connector for Zendesk makes it possible to connect Zendesk to Power BI and export any amount of data fields and tables for comprehensive reporting. Consequently, you can start building custom Zendesk reports in Power BI in just a matter of minutes.
The connector allows you to fetch Zendesk data to Power BI and align with multiple data sources. It has a user-friendly interface and advanced functional features that make it easy for anyone to create and filter data sources based on their specific analytics needs.
The Power BI Zendesk Connector is a controlled and secure way to export Zendesk data to Power BI. The connector’s data access management settings make it possible to control data access and grant permission to users based on specific predefined roles.
Zendesk Power BI Integration Practical Examples
The Power BI Zendesk Connector will be useful for any businesses and all-size teams looking to visualize their Zendesk data in Power BI for in-depth analysis.
Business Intelligence professionals who want to create complex data models in Power BI based on Zendesk ticket data combined with other data sources such as IT Service Management platforms, Project Management, and Customer Relationship Management tools for detailed and complete analysis in Power BI.
However, any team member regardless of their proficiency levels can create data sources and export required data to Power BI without technical knowledge to track the progress and evaluate results.
How to Connect Zendesk to Power BI Step By Step
The Power BI Connector for Zendesk functions as a Zendesk plugin and works with the Ticketing System of Zendesk Support. There will be a soon release of an updated version with the ability to scope data extraction from Zendesk Sell. As mentioned above, connecting Power BI & Zendesk using the Connector does not require any extra competencies or technical skills. However, only users with a Zendesk Administrator role can install and connect Zendesk to Power BI. Here’s a step-by-step guide for installing and setting up your connector.
Step 1: Install Power BI Connector for Zendesk
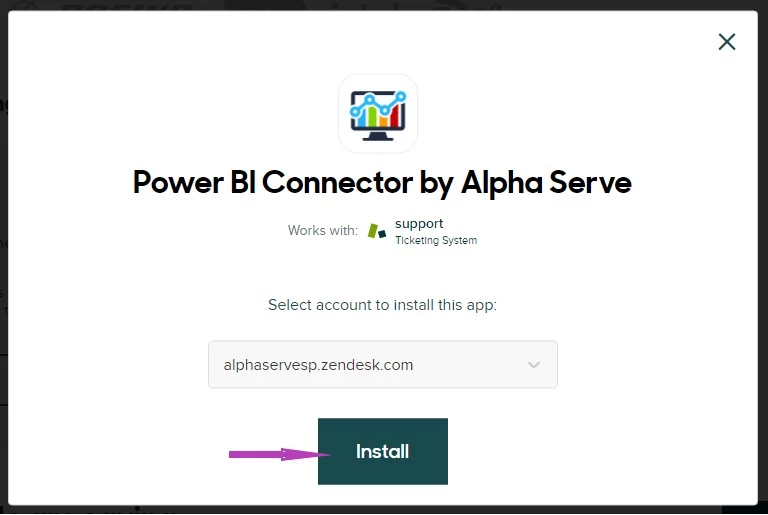
You can sign up for a free trial of the Power BI Connector by Alpha Serve from the Zendesk Marketplace. Select the most suitable plan for you from the list of options available and sign up using the “Free trial” button. You will be prompted to select your Zendesk account and press the “Install” button.
On the next page, fill in your billing details and customize your installation by choosing the title and setting roles for specific users. Once the payment information has been saved, you will be redirected to the Zendesk Admin Center.
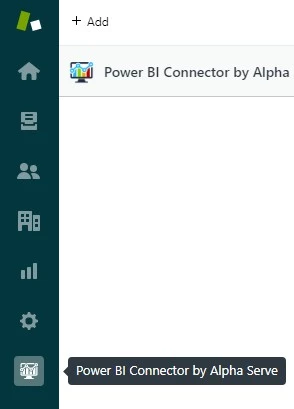
Your installation is available on the navigation panel of your admin page. When you open the Power BI Connector for Zendesk from this panel for the first time, you will be prompted to connect the application to your account via OAuth. Press the “Connect Power BI Connector” button to grant permission to read your Zendesk account data. The app is now installed and ready for setting up.
Step 2: Set up Power BI Connector for Zendesk
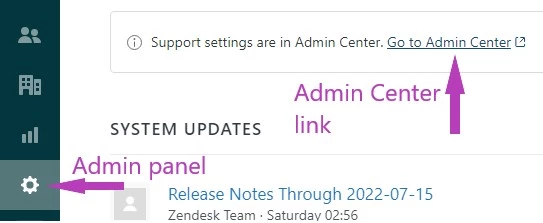
You can configure your Zendesk Power BI Connector from your Zendesk Admin Center page. From this page, open your Apps and Integrations settings then select Zendesk Support apps. On the list of your installed Zendesk apps, locate the Power BI Connector you have just installed and select it to open the settings page.
On the connector settings page, you can select a new payment plan and change your billing details. You can also customize the app by changing the title and setting specific roles for your Zendesk users. Roles can be set and restricted for each individual or group. Click the "Update" button to save all the changes you have made on the configuration page.
Step 3: Export Zendesk Data to Power BI
Exporting Zendesk data to Power BI using Alpha Serve’s Connector does not require coding experience or any advanced technical competencies. Although only Zendesk admins can install and configure the plugin, any user with a Zendesk API access token can do a Zendesk data export.
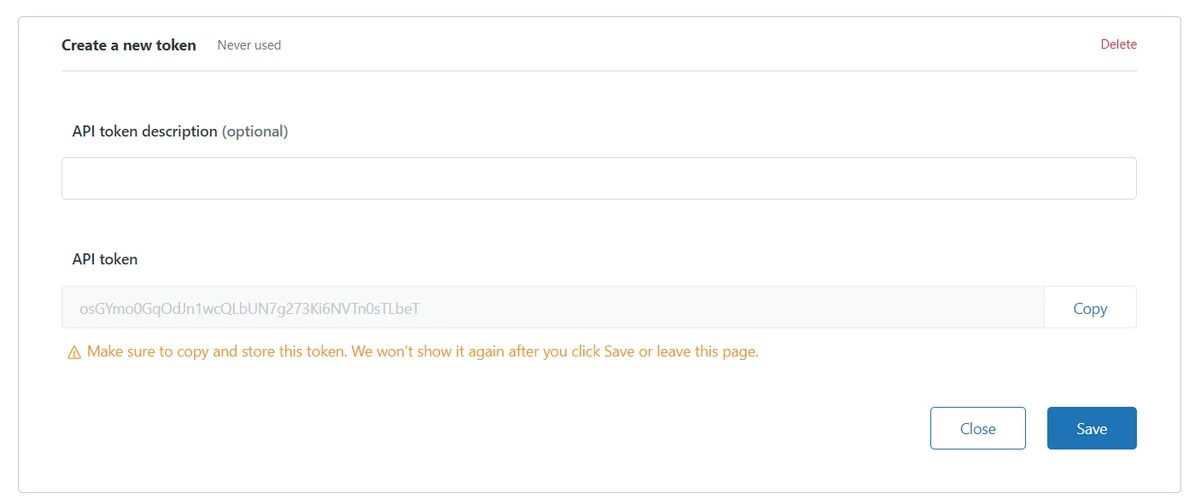
Obtain Zendesk API Access Token
From the Zendesk Admin Center, select Apps and Integrations from the navigation bar and click on Zendesk API. Enable token access if it is not enabled already and click on the “Add API token” button. You will be prompted to add a description for your API token. This will help distinguish it from other tokens you generate. Copy the API token you have generated elsewhere and press the “Save” button to complete the process.
Create a data source in Zendesk
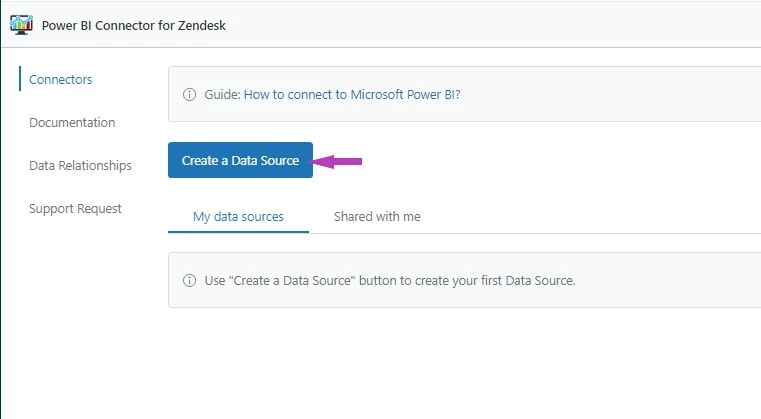
Click on the “Power BI Connector for Zendesk” icon to launch the application. Next, select the connectors then “Create a Data Source” on the next page. You will be prompted to add a name and description for your data source then modify the share settings to determine who has permission to use the data source you create. Once you have filled these fields, click on “Submit” to save changes.
When exporting data from Zendesk to Power BI, the connector offers several features you can use. You can export all your existing data or determine the specific data to export using predefined filters or customized search queries. You can also select fields to be included in the export and modify the field options accordingly. Click “Save” to confirm the changes.
Import data into Microsoft Power BI.
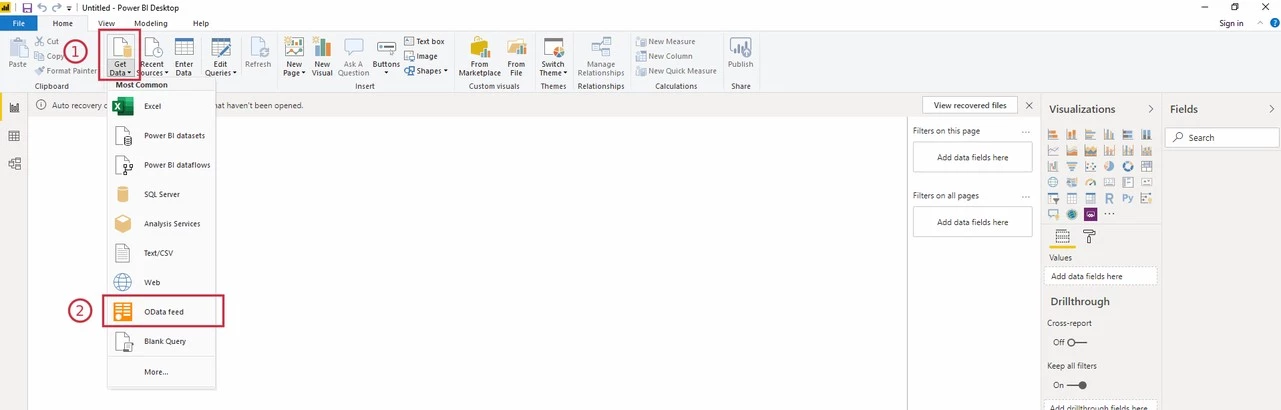
When you create a data source in Zendesk with the connector, it generates a Data Source URL which will be used to import data to your Power BI Desktop. Copy the URL generated by the Connector and open your Power BI Desktop.

Click on “OData feed” and you will be prompted to paste the URL.
Authorize the data import by providing your Zendesk credentials. The API token generated earlier will be used as the password and your Zendesk email as the Username.
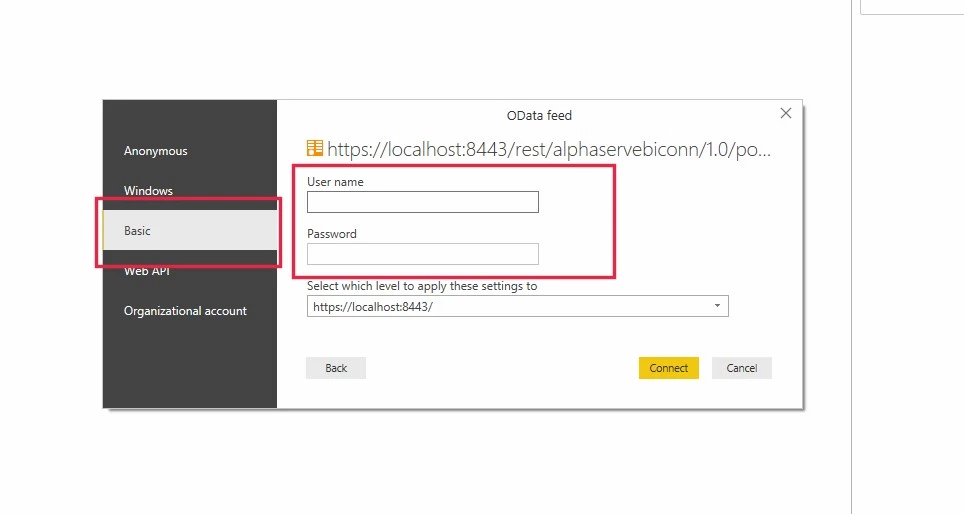
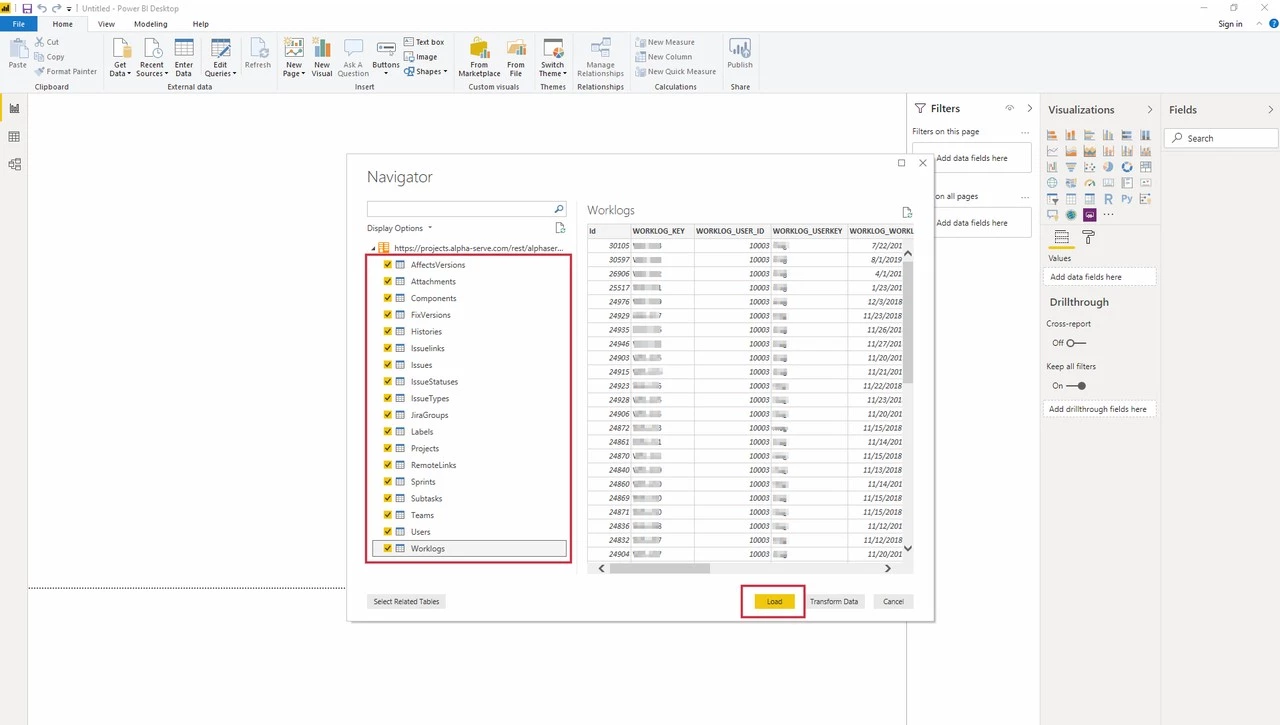
Choose the tables you need and click “Load” to begin data importation.
Now, with just a few easy clicks, you are ready to build customized complex reports for further analysis to improve your business performance with Power BI Zendesk integration.
In this documentation, you can find more information about product features and settings.
To Sum Up
Zendesk PowerBI integration using Alpha Serve’s Power BI Connector is a simple and user-friendly way to export tickets from Zendesk to Power BI for in-depth analysis. This connector allows anyone to create data sources in Zendesk with no complex programming skills and start analyzing Zendesk data with Power BI in a matter of minutes.

No comments yet