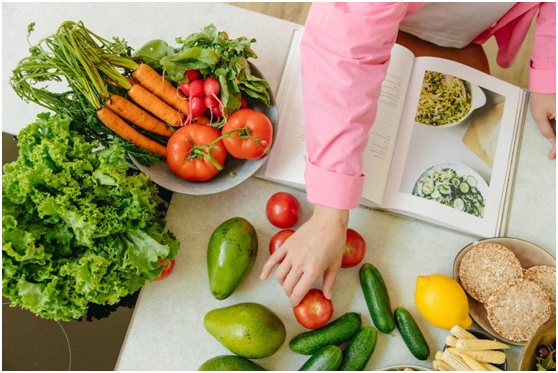
Nothing brings people together like a shared meal or a hot meal prepared with love. A DIY recipe book excels when the dish is simply too mouthwatering to not be made over and over again. It can include all the special recipes that have been passed down over the years or enjoyed at friends' homes, peppered with plenty of comforting memories.
However, if you're unsure of how to create a family recipe book from scratch, we can assist you. We'll walk you through the steps of creating your own cookbook in this article so you may impress your loved ones with your passion for cooking. Alternatively, you can have professional ebook writers do the work for you if you have a gut feeling that the content must be top notch.
Here’s a step-by-step guide to creating a recipe book from scratch:
1. Get All Your Preferred Recipes in One Place
Making your own recipe book can take a lot of effort, especially choosing which recipes to include. Ask your family members if they have any specialties to include that have been handed down through the years if you're compiling a recipe book of your favorite family dishes. An additional strategy is to compile recipes from online blogs or aspiring chefs in your neighborhood while also showcasing some of your original dishes. It's usually a good idea to give the dish's creator credit if the recipe isn't your own.
2. Turn Your Recipes Digital
This is where professional ebook writers come in handy. You undoubtedly have a collection of handwritten recipes, images from cookbooks, and bookmarked food blogs at this point. Therefore, you must choose how to display the recipes in a consistent and understandable manner. It is advised to type up all of your recipes in a word document with a font you adore.
If you choose to do it yourself, don't forget to format each piece consistently, whether that means using a bold header, listing the ingredients in bullet points, or italicizing crucial phrases to prevent them from being missed. In case you have an experienced service provider onboard, it is still beneficial to know these things so that you can cross check the things they write.
3. Sort Your Recipes
Now you must arrange your recipes in the recipe book according to a logical order that makes sense to you. This implies starting with appetizers, moving on to main dishes, followed by desserts and beverages in the majority of cookbooks. However, you can be inventive in how you display your recipes. After that, create a table of contents that will be located at the beginning of the recipe book for convenient access. You might also want to include an introduction that explains how your cookbook came to be or why you chose the particular recipes you did.
4. Find Related Pictures
Although it is entirely optional, including photographs in your recipe book does give it a lot more aesthetic appeal. There's nothing quite like flipping through a cookbook, spotting a dish that looks sumptuous, and envisioning it being served at your upcoming dinner party as inspiration.
You might wish to make every dish from scratch and take your own pictures while adding some modern design. If not, you can search royalty-free image websites for a picture that suits the recipe, or you can ask the original inventor (a relative or friend) to provide one of their own.
Unsplash and Pexels are two effective resources to look for royalty-free images in case you can’t get originals. Professional ebook writers are aware of how to appropriately place images which makes them worth it.
5. Choose a Recipe Book Layout
The sort of photo book or album you want to utilize for your recipe book must now be chosen. How many recipes and pictures you want to include, as well as how useful you want the cookbook to be, may impact this.
You may personalize your customized recipe book with your choice of cover once you've chosen the style of photo book or album including photo cover, genuine leather, animal-friendly leatherette or linen. A title, either laser engraved or embossed can also be added to highlight the culinary creations that are contained.
6. Lay It All Out
The exciting part now is organizing your recipes and images in a way that looks good and makes sense. Look through some of the other cookbooks you own to determine your preferences, whether they are full-page spreads with a recipe and a photo on one side and a single page for each recipe on the other (with or without a photo). Remember that you can combine the two methods as long as it is obvious to the reader which photo goes with which dish.
You can either copy and paste your content into text boxes, or you can capture a screenshot and add it exactly like an image. After including any supplemental images, you can rearrange the elements until you achieve the desired appearance and feel. If you're talented with graphics, you might also wish to incorporate some artistic features to distinguish between each recipe's ingredients list and preparation method.
7. Print and Distribute
It's time to have your cookbook produced and published once you're completely satisfied with how it looks. A homemade recipe book is the perfect gift, especially if you want to give something special during the holidays or for a forthcoming birthday. You can print one for yourself and other copies for loved ones, contributors, and friends who also enjoy food.
Conclusion
As much fun as it is, creating a recipe book from scratch can require extensive efforts. It can be especially difficult in the absence of adequate guidance. Although there is no advanced science and mechanisms to it, there is a method to it. Follow the above mentioned guidelines and you’ll have a cookbook ready to present within no time. You can easily hire ebook services in order to assist you in creating a recipe book from scratch.

No comments yet