
Are you new to QuickBooks and unsure how to set up a Chart of Accounts in QuickBooks? Don't worry, we're here to help! This guide will walk you through the process step by step, ensuring you can efficiently organize your financial data in QuickBooks. For any further information or assistance, the user can contact the QuickBooks toll-free number at +1-844-405-0907.
What is a Chart of Accounts?
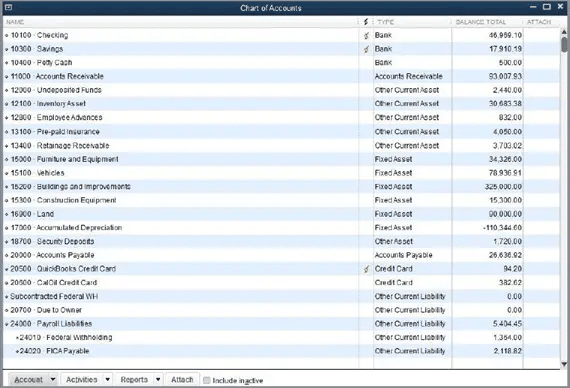
The Chart of Accounts is a crucial component of QuickBooks that organizes and categorizes your company's financial transactions. It provides a clear overview of your assets, liabilities, income, and expenses, making it easier to track and manage your finances effectively.
How to Set Up a Chart of Accounts in QuickBooks:
- Access QuickBooks:
- Log in to your QuickBooks account and navigate to the "Settings" or "Company" menu.
- Select "Chart of Accounts" from the options available.
- Add Accounts:
- Click on the "New" button to add a new account to your Chart of Accounts.
- Choose the account type from the dropdown menu, such as "Bank," "Expense," "Income," etc.
- Enter the account name and description, ensuring it accurately reflects the purpose of the account.
- Save the account to add it to your Chart of Accounts.
- Customize Accounts:
- Customize your accounts by assigning them specific numbers or codes for easy reference.
- You can also organize accounts into sub-accounts or categories to further streamline your Chart of Accounts.
- Edit or Delete Accounts:
- If needed, you can edit or delete accounts from your Chart of Accounts.
- Simply select the account you wish to modify or remove and choose the appropriate option from the menu.
- Reorder Accounts:
- Arrange your accounts in the desired order by dragging and dropping them within the Chart of Accounts.
- This allows you to prioritize accounts based on their importance or relevance to your business.
- Review and Finalize:
- Once you've added, customized, and organized your accounts, review your Chart of Accounts to ensure accuracy.
- Make any necessary adjustments before finalizing your Chart of Accounts.
See Also: use QuickBooks connection diagnostic tool
Conclusion:
Setting up a Chart of Accounts in QuickBooks is essential for effectively managing your company's finances. By following the simple steps outlined in this guide, you can create a customized Chart of Accounts tailored to your business needs.
For further assistance or guidance, feel free to reach out to us QuickBooks Support team professionals at +1-844-499-6700. Our team is dedicated to helping you make the most of QuickBooks and streamline your financial processes effortlessly!

No comments yet