Have you ever wished for a covered parking space for your car but thought it was too expensive or complicated to build? Well, think again! In this blog post, we will guide you through the process of building your very own DIY carport from scratch.
Not only will you save money by doing it yourself, but you will also experience the satisfaction of creating something with your own two hands.
So, let's get started on this exciting journey of building a DIY carport.
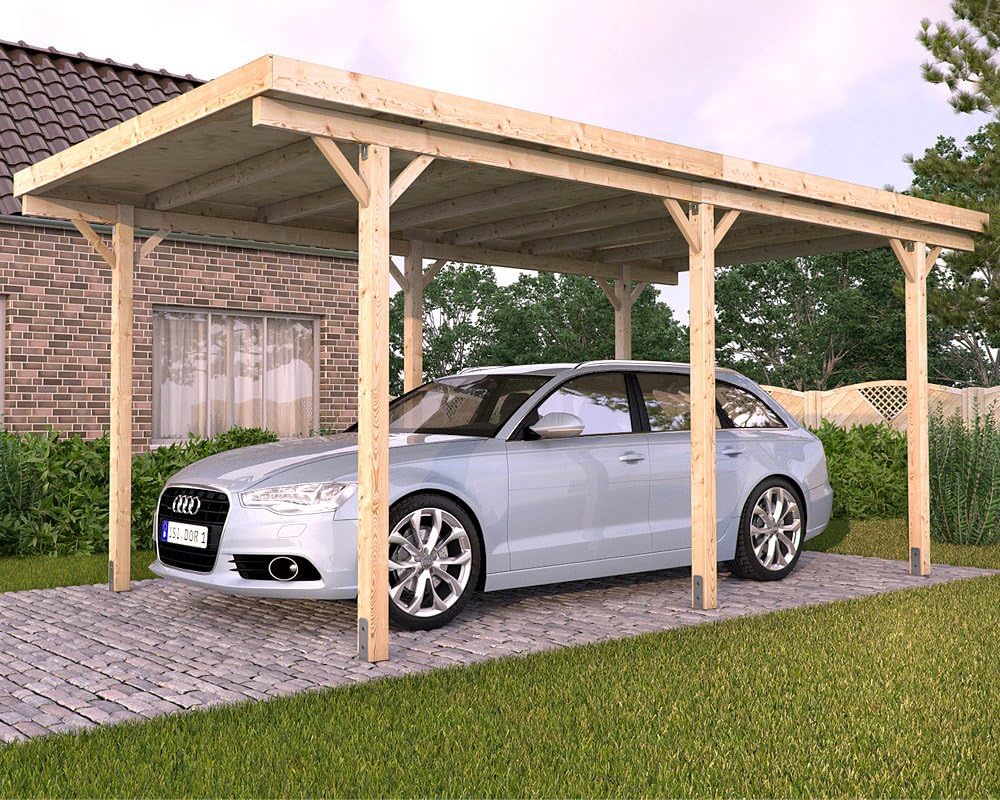
Before we dive into the nitty-gritty details of building a carport, let's first understand the benefits of having one. A carport provides shelter for your vehicle, protecting it from the elements such as rain, snow, and harmful UV rays. It also shields your car from falling branches, bird droppings, and other debris that can cause damage. Additionally, a carport can extend the lifespan of your car's paintwork and reduce the need for frequent washing and waxing.
Building a DIY carport is not only cost-effective but also a rewarding endeavour. By choosing to build it yourself, you have the power to customise the design, size, and materials according to your preferences and needs. Moreover, you will feel a great sense of pride and accomplishment every time you park your car under the shade of your very own creation.

Planning and Preparation
The first step in any construction project is careful planning and preparation. Before you grab your tools, it is essential to research local regulations and permits required for building a carport. Contact your local zoning office or building department to ensure that you comply with all the necessary codes and obtain the required permits. This step will save you from potential legal issues down the road.
Once you have the green light to proceed, it's time to measure the available space and determine the appropriate size for your carport. Consider factors such as the number of cars you want to accommodate, the space available, and any future needs. Sketch out the design, keeping in mind the roof slope, materials, and additional features you may want to incorporate.
Gathering Materials and Tools
Before you start construction, create a checklist of materials needed for your DIY carport project. This will ensure that you have everything on hand and minimise any delays during the building process. Here are some essential materials you will need:
- Lumber for the frame: Choose pressure-treated lumber that is resistant to rot and insects. The size and quantity will depend on your design and measurements.
- Roofing materials: DIY carports can be covered with metal sheets or shingles. Consider durability, cost, and aesthetic preferences when selecting the roofing material.
- Fasteners: Nails, screws, brackets, and other fasteners will be necessary to secure the components of your carport.
- Concrete mix: If your carport requires a foundation, you will need a concrete mix to create a solid base.
- Tools: Ensure you have the necessary tools, such as a hammer, drill, saw, measuring tape, and any other tools specific to your design.
Foundation Construction
A solid foundation is crucial for the stability and longevity of your DIY carport. Here are the steps to construct a strong foundation:
- Clear the area: Remove any vegetation or debris from the area where you intend to build your carport. This will ensure a clean and level surface.
- Mark out the space: Use stakes and string to mark the perimeter of your carport. Double-check the measurements to ensure accuracy.
- Dig post holes or pour concrete footings: Depending on your design, you may need to dig post holes or pour concrete footings to anchor the structure securely. Follow the local building codes and regulations regarding the depth and width of the holes or footings.
- Allow time for concrete to cure: If you are using concrete footings, allow ample time for the concrete to cure and gain strength before proceeding with the construction of the frame. This process usually takes a few days.
Building the Frame
Now that you have a solid foundation in place, it's time to start building the frame of your DIY carport. Follow these step-by-step instructions:
- Cut lumber according to measurements: Use a saw to cut the lumber according to the dimensions specified in your design. Double-check the accuracy of each cut to ensure proper alignment.
- Assemble posts, beams, and rafters: Begin by attaching the posts to the foundation or anchoring them securely in the post holes. Then, attach the beams horizontally to the tops of the posts, creating the main structure of the carport. Finally, add rafters diagonally between the beams to provide additional support and stability.
- Use brackets or joinery techniques: To secure the connections between the posts, beams, and rafters, use brackets or traditional joinery techniques such as mortise and tenon or half-lap joints. These methods will ensure a strong and durable frame.
- Ensure proper alignment and stability: Throughout the construction process, use a level to ensure that all components are aligned correctly. This will prevent any issues with the roof installation and overall stability of the carport.
Installing Roofing Materials
The next step in building your DIY carport is installing the roofing materials. Here's how to do it:
- Choose suitable roofing material: Consider factors such as durability, cost, and aesthetic preferences when choosing the roofing material for your carport. Metal sheets and shingles are popular options for DIY carports due to their weather resistance and ease of installation.
- Attach roofing material carefully: Follow the manufacturer's instructions for attaching the chosen roofing material to your carport frame. Pay attention to the recommended fasteners and spacing to ensure a secure and watertight roof.
Adding Finishing Touches
To enhance the functionality and appearance of your DIY carport, consider adding some finishing touches. Here are a few optional features you can include:
- Install gutters and downspouts: By adding gutters and downspouts, you can redirect water away from the carport area, preventing water damage to the structure and the surrounding ground.
- Add lighting fixtures: For increased visibility and security, consider installing lighting fixtures around your carport. This will make parking and accessing your car at night much easier and safer
- Paint or stain the wood: If you want to give your carport a polished and finished look, consider painting or staining the wood. Choose a colour that complements your house or other structures on your property.
Maintenance and Upkeep
To ensure the longevity of your DIY carport, regular maintenance is essential. Here are a few tips to keep in mind:
- Regularly inspect for damage: Periodically check your carport for any signs of damage or wear. Look for loose connections, cracks in the wood, or signs of rust on metal components. Address any issues promptly to prevent further damage.
- Clean debris from the roof and gutters: Remove leaves, twigs, and other debris from the roof and gutters. This will prevent clogging and ensure proper water drainage.
- Apply protective coatings or sealants: Depending on the material used for your carport, apply protective coatings or sealants as needed. This will help maintain the integrity of the structure and protect it from the elements.
Conclusion
Building a DIY carport from scratch is not as daunting as it may seem. With careful planning, preparation, and the right tools and materials, you can create a functional and aesthetically pleasing shelter for your vehicle. By taking on this challenging yet rewarding project, you will not only save money but also experience the satisfaction of building something with your own hands. So why wait? Start planning your DIY carport today and enjoy the benefits of having a covered parking space for your car. Happy building!

No comments yet