In the dynamic realm of mobile app development, achieving a seamless and user-friendly experience is paramount for success. Google's Flutter has risen as a formidable framework, empowering developers to construct cross-platform mobile applications efficiently with a singular codebase.
This all-encompassing guide aims to lead you through the meticulous process of developing a Flutter E-commerce app.
Our goal is to ensure your comprehensive understanding of the essentials, fostering the creation of a robust application in collaboration with a proficient Flutter app development company.
Understanding Flutter:
Flutter is an open-source UI software development toolkit created by Google. It allows developers to build natively compiled applications for mobile, web, and desktop from a single codebase. Flutter's primary language is Dart, which is easy to learn and offers excellent performance. Its hot reload feature enables developers to experiment, build UIs, add features, and fix bugs faster.
Setting Up the Development Environment:
Before diving into Flutter development, it's essential to set up your development environment. Follow these steps:
Install Flutter SDK:
Download the latest stable version of the Flutter SDK from the official Flutter website.
Extract the downloaded ZIP file to a preferred location on your machine.
Add the Flutter/bin directory to your system's PATH variable.
Install Dart:
Flutter relies on Dart, so you need to install it as well. Download Dart from the Dart SDK official website and follow the installation instructions.
IDE Setup:
Choose an Integrated Development Environment (IDE) for Flutter development. Popular choices include Visual Studio Code, Android Studio, or IntelliJ IDEA.
Install the Flutter and Dart plugins for your chosen IDE.
Creating a New Flutter Project:
Once your development environment is set up, it's time to create your Flutter project. Open your terminal or command prompt and run the following commands:
flutter create ecommerce_app
cd ecommerce_app
This will create a new Flutter project named "ecommerce_app" in your current directory.
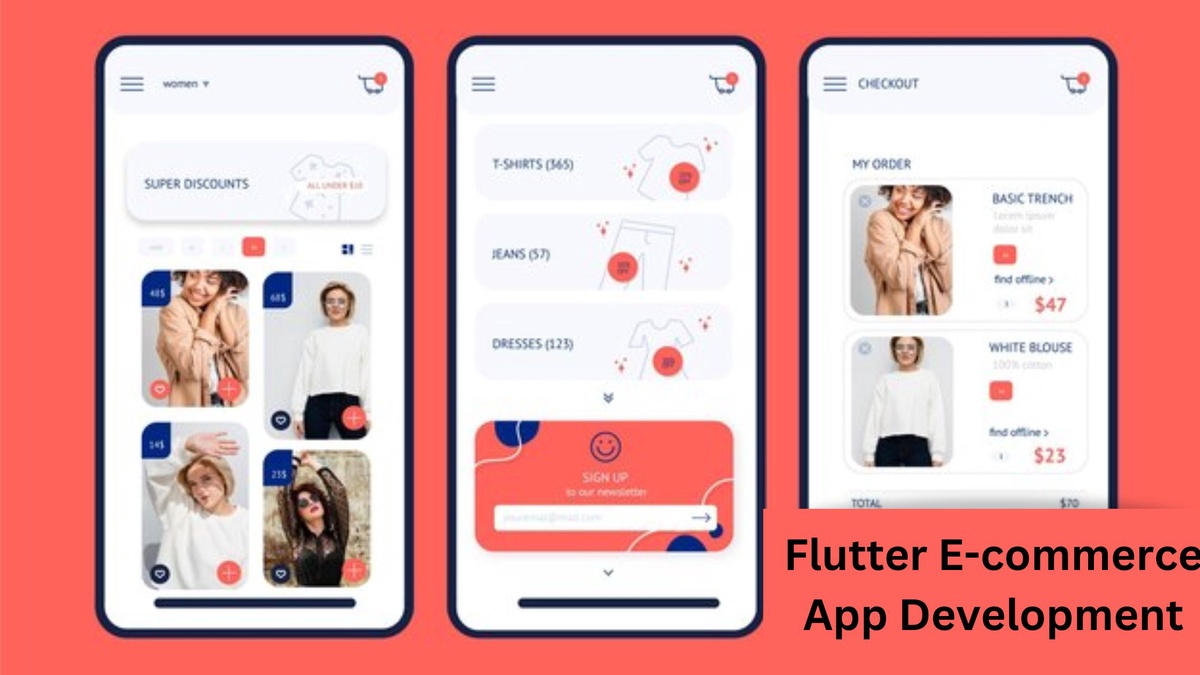
Designing the User Interface:
Flutter uses a widget-based architecture for UI design. Widgets are building blocks that make up the UI components of a Flutter app. Let's design the UI for our E-commerce app:
Home Page:
Create a home page that displays featured products, promotions, and categories.
Utilize Flutter widgets like ListView, Container, and Column for a structured layout.
Product Listing Page:
Implement a page to display a list of products within a chosen category.
Use Flutter's GridView to showcase products in a visually appealing manner.
Product Details Page:
Create a page to show detailed information about a selected product.
Use widgets like Image, Text, and FlatButton to provide a clean and informative layout.
Shopping Cart:
Implement a shopping cart page where users can view and manage their selected items.
Utilize Flutter's state management to handle changes in the cart.
User Authentication:
Integrate user authentication features to allow users to sign in, sign up, or continue as a guest.
Adding Functionality:
Now that we have our basic UI structure in place, let's add functionality to make our app dynamic and interactive.
State Management:
Choose a state management approach for your Flutter app. Options include Provider, Bloc, or Riverpod.
Implement state management to handle app-wide data, such as user authentication status and shopping cart contents.
API Integration:
Connect your app to a backend server using RESTful APIs or GraphQL.
Implement API calls to fetch product data, user information, and handle authentication.
User Authentication:
Integrate Firebase Authentication or another authentication service to handle user sign-in and sign-up.
Secure user data and manage authentication states using Flutter's state management.
Shopping Cart Functionality:
Implement the ability to add products to the shopping cart.
Allow users to adjust the quantity or remove items from the cart.
Payment Integration:
If applicable, integrate a payment gateway for secure and seamless transactions.
Utilize Flutter packages or plugins for popular payment services.
Testing:
Testing is a crucial aspect of app development to ensure a bug-free and reliable user experience.
Unit Testing:
Write unit tests for individual functions and classes to validate their correctness.
Widget Testing:
Perform widget testing to ensure the UI components behave as expected.
Integration Testing:
Conduct integration tests to validate the interactions between different parts of your app.
Optimization and Deployment:
Before deploying your Flutter E-commerce app, optimize it for performance and address any potential issues.
Performance Optimization:
Optimize images and assets to reduce app size.
Implement code splitting to load only necessary components on demand.
Deployment:
Choose the platform(s) for deployment (iOS, Android, or both).
Follow platform-specific guidelines for publishing your app to the App Store or Google Play Store.
Continuous Integration/Continuous Deployment (CI/CD):
Set up CI/CD pipelines to automate testing and deployment processes.
Conclusion
Embarking on the journey of building a Flutter e-commerce app opens doors to a world of possibilities in mobile app development. With the guidance provided in this comprehensive tutorial, you now possess the knowledge and skills to create a seamless, user-centric application.
To take your project to the next level and ensure its success, consider to hire flutter app developers. Their expertise and experience will undoubtedly contribute to the refinement and optimization of your Flutter E-commerce app.

No comments yet