Are you tired of dealing with constant leaks and damaged shingles on your roof? If you're looking for a durable and long-lasting solution, it's time to consider installing a metal roof over your existing shingles.
Not only will this save you money and time, but it will also provide you with a sleek high risk merchant highriskpay.com and modern look for your home. In this article, we'll guide you step-by-step on how to install metal roofing over shingles.
1. Assess the Condition of Your Shingles
Before you start the installation process, it's important to determine the condition of your shingles. If they are severely damaged, it's advisable to remove them entirely before installing the metal roof.
However, if they are still in good condition, you can install the metal roof directly over them, saving you the hassle and additional expenses.
2. Gather the Necessary Tools and Materials
To ensure a smooth installation process, gather all the necessary tools and materials beforehand. These may include metal roofing panels, metal roofing screws, a drill, a ladder, a chalk line, roofing felt, and metal roofing trim, amongst others. Having all these items ready will make the installation process efficient and swift.
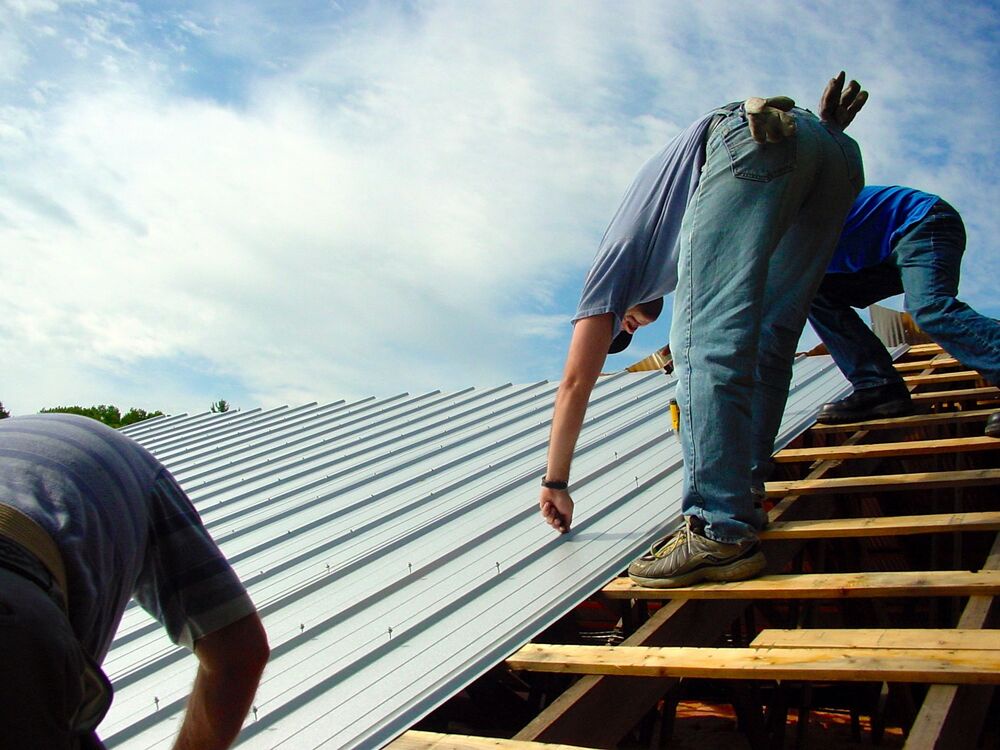
3. Prepare the Roof
Before installing the metal roofing, it's crucial to prepare the roof surface. Start by removing any loose debris or branches from the roof. Then, ensure the roof is clean and clear of any obstacles 02045996879. Next, lay down a layer of roofing felt, ensuring that it is securely attached to the roof. This will provide an extra layer of protection against any potential leaks.
4. Measure and Plan
It's essential to accurately measure the dimensions of your roof to ensure you have the correct amount of metal panels. Take into account any roof vents or protrusions that might require additional materials. Use a chalk line to mark the layout of the panels on the roof, ensuring they are aligned properly.
5. Attach the Metal Roofing Panels
Now comes the exciting part – attaching the metal roofing panels. Start at the bottom corner of the roof, placing the first panel and ensuring it is aligned with the edge of the roof. Use the drill and metal roofing screws to secure the panel in place, placing screws approximately two feet apart. Repeat this process for the remaining panels, ensuring they overlap correctly to prevent any possible leaks.
6. Finish with Metal Roofing Trim
To give your metal roof a polished and professional look, complete the installation with metal roofing trim. Install metal flashing around any roof edges to further prevent leaks and protect the roof from potential damage. Trim the excess edges of the roofing panels using tin snips or metal cutters for a neat finish 02045996875.
7. Inspect and Maintain
Once you've completed the installation, take the time to thoroughly inspect your new metal roof. Ensure that all panels are securely fastened, and there are no visible gaps or openings aiotechnical.com. Regularly maintain and clean your metal roof to extend its lifespan and ensure it continues to provide the protection your home deserves.
By following these simple steps, you can confidently install a metal roof over your existing shingles, transforming your home's appearance and providing a durable solution to your roofing needs. So, why wait? Say goodbye to shingle problems and embrace the beauty and resilience of metal.

No comments yet