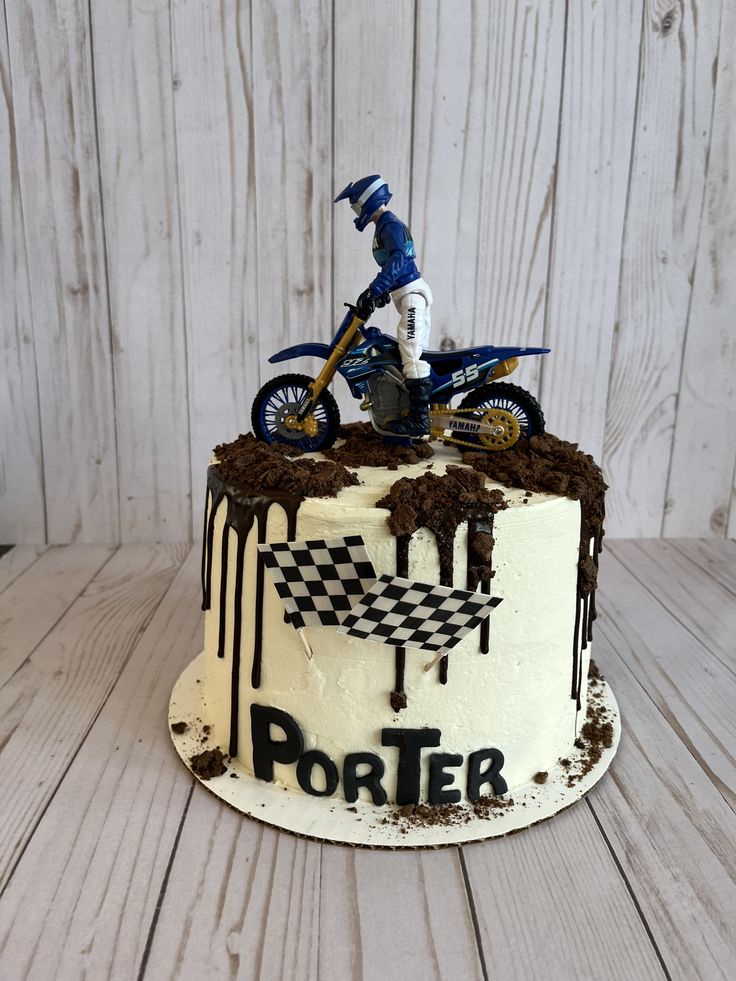
Are you ready to rev up your baking skills and create a show-stopping dirt bike cake? Whether it's for a birthday celebration or a themed event, this detailed guide will take you through the step-by-step process of crafting a delicious and visually stunning dirt bike cake that will leave everyone impressed.
Ingredients You'll Need:
- Cake mix of your choice (enough for two 8-inch rounds)
- Buttercream frosting (homemade or store-bought)
- Fondant (in various colors for decorating)
- Gel food coloring (for custom colors)
- Edible silver or metallic paint (optional for accents)
- Edible markers (for detailing)
- Toothpicks (for assembly)
- Cake board or serving platter
Equipment You'll Use:
- Mixing bowls and spoons
- Electric mixer (hand or stand)
- Offset spatula
- Rolling pin
- Cake leveler or serrated knife
- Bench scraper or straight edge
- Piping bags and tips
- Small paintbrushes (for painting details)
- Template or picture of a dirt bike for reference
Step 1: Bake the Cakes
Start by preheating your oven according to the cake mix instructions. Prepare the cake batter and divide it evenly between two greased and floured 8-inch round cake pans. Bake according to the package instructions, then let the cakes cool completely on a wire rack.
Step 2: Prepare the Frosting and Fillings
While the cakes are cooling, prepare your buttercream frosting. You can add flavorings like vanilla or almond extract for an extra touch. If desired, you can also make a filling for the cake, such as chocolate ganache or fruit preserves.
Step 3: Level and Stack the Cakes
Once the cakes are cooled, use a cake leveler or a serrated knife to level off the tops if needed. Place one cake layer on your cake board or serving platter and spread a layer of frosting on top. Add any filling you've prepared, then place the second cake layer on top.
Step 4: Crumb Coat and Chill
Apply a thin layer of frosting around the entire cake to create a crumb coat. This helps seal in any crumbs and provides a smooth base for decorating. Chill the cake in the refrigerator for about 30 minutes to set the crumb coat.
Step 5: Shape the Dirt Bike
While the cake chills, it's time to work on shaping the dirt bike. Roll out fondant in the colors you need for the bike frame, wheels, and other details. Use a template or picture for reference as you cut and shape the fondant pieces. You can also use gel food coloring to achieve custom colors.
Step 6: Decorate the Cake
Once the crumb coat is set and the fondant pieces are ready, it's time to decorate the cake. Start by covering the cake with a final layer of buttercream frosting, smoothing it out as much as possible. Then, carefully place the fondant pieces onto the cake to create the dirt bike design.
Step 7: Add Details and Finishing Touches
Using edible markers, paint, or additional fondant pieces, add details like the bike's handlebars, seat, and any logos or numbers. You can also use edible silver or metallic paint to add a realistic touch to the bike's metallic parts.
Step 8: Present Your Masterpiece
Once all the decorations are in place, step back and admire your dirt bike cake masterpiece! Serve slices of the cake to your guests and watch as they marvel at your creative and delicious creation.
Tips for Success:
- Work with chilled fondant for easier handling and shaping.
- Use a sharp knife or fondant tools for precise cuts and detailing.
- Practice piping buttercream for smoother finishes and intricate designs.
- Experiment with different flavors and fillings to personalize your cake.
- Take your time and enjoy the process of bringing your dirt bike cake to life!
With this guide and a bit of creativity, you'll be able to make a dirt bike cake that not only looks amazing but tastes delicious too. Happy baking and happy riding!

No comments yet