The Solar Inverter with Raspberry Pi 4 IoT project is a DIY project that combines the power of renewable energy with the capabilities of a small computer, the Raspberry Pi 4. This project allows you to convert DC power generated by solar panels into AC power that can be used to power various electrical appliances.
By incorporating the Raspberry Pi 4, the project also enables remote monitoring and control of the solar inverter from anywhere in the world. In this article, we will delve into the components and functionalities of this innovative project and explore how it can be customized to suit your specific needs.
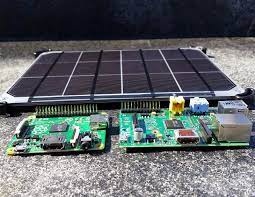
Components
To build this solar inverter, we will require the following materials:
- Raspberry Pi 4
- Solar Panels
- Solar Charge Controller
- Relay Module
- LCD Display
- Resistors
- Capacitors
- Diodes
- Connecting wires
- Breadboard
- Soldering Iron
- Screwdriver
Raspberry Pi 4
The Raspberry Pi 4 is the heart of the Solar Inverter with Raspberry Pi 4 IoT project, as it controls the entire system and converts the DC power from the batteries into AC power that can be used by various electrical appliances.
The Raspberry Pi 4 is a credit-card-sized computer that is capable of running various operating systems and programming languages. In this project, the Raspberry Pi 4 is programmed using the Python programming language, which allows for easy customization of the program to suit the specific needs of the user.
The Raspberry Pi 4 is connected to various components in the solar inverter simulation, such as the solar charge controller, relay module, and LCD display. The Raspberry Pi 4 communicates with these components using various protocols, such as the I2C protocol and the GPIO pins.
The program running on the Raspberry Pi 4 is responsible for controlling the relay module, which converts the DC power from the batteries into AC power. The program also communicates with the Solar Charge Controller to monitor the charging status of the batteries and adjust the charging current if necessary.
Solar Charge Controller
The Solar Charge Controller is a critical component in the Solar Inverter with Raspberry Pi 4 IoT project, as it regulates the flow of electrical power from the solar panels to the batteries. The Solar Charge Controller ensures that the batteries are charged efficiently and safely and protects them from overcharging and discharging.
The Solar Charge Controller used in this project is a PWM (Pulse-Width Modulation) controller, which is a commonly used type of solar charge controller. The controller is rated for 12V and has a maximum charging current of 10A.
The Solar Charge Controller is connected to the solar panels and the batteries, and it regulates the charging process by controlling the flow of current between the two. The controller uses a pulse-width modulation technique to control the charging current, which ensures that the batteries are charged efficiently and without any damage.
The Solar Charge Controller also has various protection features, such as overcharging and over-discharging protection, which ensure that the batteries are not damaged during the charging process. The controller also has a built-in reverse polarity protection feature, which prevents damage to the system if the battery is connected incorrectly.
Working Principle
The solar panels are the primary source of power for this solar inverter project. They generate DC power, which is then stored in the batteries through the solar charge controller. The charge controller ensures that the batteries are charged correctly and efficiently, and it prevents overcharging or undercharging of the batteries.
Once the batteries are charged, the Raspberry Pi 4 takes over. The Raspberry Pi 4 is programmed to control the relay module, which is responsible for converting the DC power from the batteries into AC power. The relay module uses a switching mechanism to alternate the direction of current flow, which produces an AC waveform that can be used to power appliances and devices.
To ensure the stability and safety of the circuit, resistors, capacitors, and diodes are used. Resistors are used to limit the current flow, while capacitors are used to store and discharge electrical energy. Diodes are used to protect the circuit from electrical surges by allowing current to flow in one direction only.
An LCD display is also used in this project to show the status of the solar inverter. The display provides information such as the voltage and current being produced by the solar panels, the state of the batteries, and the status of the relay module. This information can be used to monitor the performance of the solar inverter and make adjustments if necessary.
Building the Circuit
To build the circuit, we need to follow the below steps:
- Connect the solar panels to the solar charge controller and connect the charge controller to the batteries.
- Connect the relay module to the Raspberry Pi 4 using the GPIO pins.
- Connect the LCD display to the Raspberry Pi 4 using the I2C interface.
- Connect the resistors, capacitors, and diodes as per the circuit diagram to regulate and protect the circuit.
- Use the screwdriver to tighten the connections and the soldering iron to solder the components.
Programming the Raspberry Pi 4
The Raspberry Pi 4 is a versatile single-board computer that is widely used in IoT projects due to its processing power and ability to interface with a wide range of electronic components. In this solar inverter project, the Raspberry Pi 4 is the brain of the system, responsible for controlling the relay module and converting the DC power from the batteries into AC power that can be used to power appliances and devices.
The Raspberry Pi 4 is programmed using the Python programming language, which is easy to learn and widely used in the IoT community. The Python program is responsible for controlling the relay module and converting the DC power from the batteries into AC power. The program also displays the status of the solar inverter on the LCD display.
The Python code used in this project can be easily customized to suit the specific needs of the user. For example, the program can be modified to add more sensors or to control other electronic components. The code is well-documented and commented, making it easy to understand and modify.
Using the Raspberry Pi 4 in this project has a significant advantage, which is the ability to remotely monitor and control the solar inverter by connecting it to the internet. This can be achieved by adding a Wi-Fi module or connecting the Raspberry Pi 4 to an Ethernet cable. With internet connectivity, the user can easily check the status of the solar inverter from any location around the world and make necessary adjustments. This feature provides a convenient way to monitor the performance of the solar inverter, making it possible to detect and address any issues promptly, regardless of the user's location.
Conclusion
Building a solar inverter with the Raspberry Pi 4 is an excellent IoT project for anyone interested in renewable energy sources and home automation. This project provides a hands-on experience in circuit building, programming, and troubleshooting. With the right materials and instructions, anyone can build this solar inverter and contribute to a greener environment.

No comments yet