Soundproofing between floors is essential for maintaining peace in multi-level homes. Whether you're dealing with noisy neighbors, footsteps from above, or loud music reverberating through the ceiling, soundproofing can help create a more comfortable and peaceful living environment. In this comprehensive guide, we'll walk you through the process of soundproofing between floors with easy-to-follow DIY steps.
Assessing the Existing Situation:
Before you start soundproofing, it's essential to assess the existing situation to determine the source of the noise and the areas that require improvement. Identify any gaps, cracks, or openings in the floor structure that may be allowing sound to travel between floors. Pay attention to areas where sound transmission is most noticeable, such as near stairwells, vents, and electrical outlets.
Choosing the Right Materials:
Selecting the right materials is crucial for effective soundproofing between floors. Common materials used for soundproofing include acoustic insulation, resilient channels, soundproof underlayment, and mass-loaded vinyl. Consider the level of soundproofing you require and the specific characteristics of each material before making your decision. For example, if impact noise is a concern, choose materials with high impact resistance.
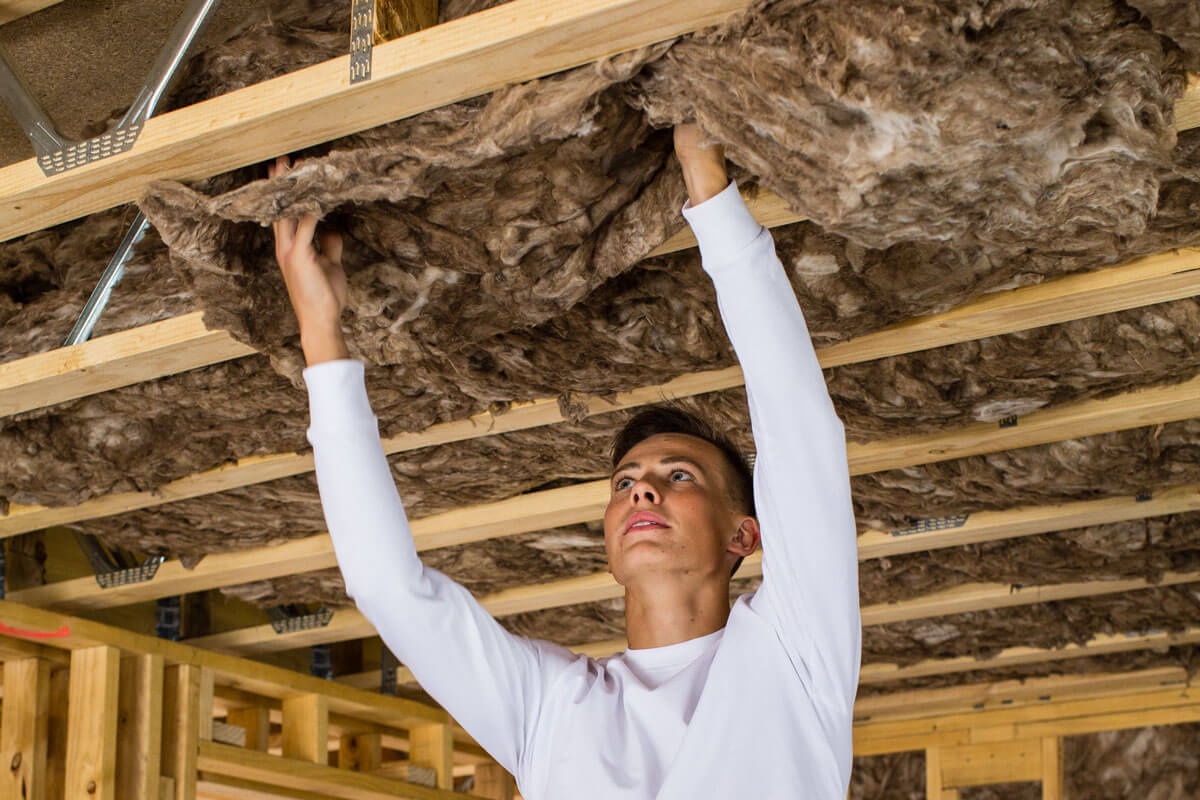
Installing Acoustic Insulation:
Acoustic insulation is a key component of soundproofing between floors. It helps absorb sound waves and prevent them from traveling between floors. Start by installing acoustic insulation between floor joists or beneath floorboards. Make sure to use insulation material with the appropriate thickness and density for maximum sound absorption. Secure the insulation in place using staples or adhesive, taking care to fill any gaps or voids.
Adding Resilient Channels:
Resilient channels are metal strips that are attached to the ceiling joists to decouple the ceiling from the floor above, reducing the transmission of sound vibrations. Install resilient channels perpendicular to the direction of the floor joists, spacing them according to the manufacturer's instructions. Secure the channels to the ceiling joists using screws or nails, ensuring they are level and evenly spaced.
Installing Soundproof Underlayment:
Soundproof underlayment is another effective way to reduce impact noise between floors. It consists of dense materials such as rubber or cork that absorb vibrations and dampen sound transmission. Lay the underlayment over the subfloor before installing the finished flooring material. Make sure the underlayment covers the entire floor area and extends slightly up the walls to create a continuous barrier against sound transmission.
Applying Mass-Loaded Vinyl:
Mass-loaded vinyl (MLV) is a dense, flexible material that adds mass to the floor assembly, helping to block airborne noise from traveling between floors. Cut the MLV to size and lay it over the subfloor or underlayment before installing the finished flooring material. Use adhesive or double-sided tape to secure the MLV in place, ensuring it overlaps at seams and around the perimeter of the room.
Sealing Gaps and Cracks:
To further reduce sound transmission between floors, seal any gaps, cracks, or openings in the floor structure. Use acoustical caulk or sealant to fill gaps around baseboards, electrical outlets, pipes, and ductwork. Pay special attention to areas where sound may be leaking through, such as around door frames and windows. Apply a generous amount of caulk to create an airtight seal.
Adding a Layer of Carpet or Rug:
If impact noise is still a concern after installing soundproofing materials, consider adding a layer of carpet or rug to the floor surface. Carpet and rugs act as additional sound absorbers, dampening impact noise from footsteps and furniture movement. Choose dense, thick carpeting with a high pile height for maximum sound absorption. Alternatively, opt for a rug with a thick pad underneath for added cushioning and noise reduction.
Testing and Adjusting:
Once you've completed the soundproofing installation, it's essential to test the effectiveness of the measures you've taken. Play music or generate noise on the floor above and listen for any noticeable reduction in sound transmission. If necessary, adjust the soundproofing materials or add additional layers to achieve the desired level of soundproofing.
Final Thoughts:
Soundproofing between floors is a worthwhile investment for homeowners seeking to improve the comfort and tranquility of their living spaces. By following these step-by-step DIY instructions and using the right materials, you can effectively reduce noise transmission between floors and enjoy a quieter, more peaceful home environment. Remember to assess the existing situation, choose the right materials, and test the effectiveness of your soundproofing measures to achieve optimal results. With a little effort and planning, you can create a space where noise disturbances are minimized, and tranquility prevails.

No comments yet