Welcome to "The Ultimate Guide to Concrete Floor Polishing Techniques." This comprehensive blog post will walk you through everything you need to know about concrete floor polishing. Whether you're a homeowner looking to upgrade your floors or a professional contractor seeking to enhance your skills, this guide has got you covered.
Concrete Floor Polishing Melbourne is not just about aesthetics; it also offers numerous benefits. Polished concrete floors are durable, long-lasting, and easy to maintain. They provide a sleek and modern look to any space while being cost-effective compared to other flooring options.
So, let's dive into the world of concrete floor polishing and explore techniques to help you achieve stunning results.
Understanding Concrete Floor Polishing
Before we begin, let's understand what concrete floor polishing is. Concrete floor polishing involves mechanically grinding and polishing the surface of concrete to create a smooth and glossy finish. This process enhances the floor's appearance and strengthens it, making it resistant to stains, spills, and wear and tear.
Not all concrete floors are suitable for polishing. Knowing the different types of concrete floors that can be polished is essential. Generally, newly poured, unsealed, and structurally sound concrete floors are ideal candidates for polishing. However, it's always best to consult with a professional to assess the condition of your floor before proceeding.
One of the major advantages of concrete floor polishing is its cost-effectiveness. Concrete floor polishing Melbourne is more affordable than other flooring options, such as hardwood or carpet. It eliminates the need for additional materials, such as tiles or laminate, and reduces maintenance costs in the long run.

Preparing Your Concrete Floor for Polishing
Proper preparation is essential for achieving a flawless polished concrete floor. Here's a step-by-step guide on how to prepare your concrete floor:
- Clean the floor: Using a broom or vacuum cleaner, remove any dirt, dust, or debris. For stubborn stains, consider using a mild detergent or concrete cleaner.
- Repair imperfections: Inspect the floor for cracks, holes, or uneven surfaces. Fill any cracks or holes with a suitable concrete patching compound and level the surface using a trowel.
- Grind the floor: Use a concrete grinder with a diamond grinding disc to remove any existing coatings, adhesives, or sealants. This step ensures a clean and smooth surface for the polishing process.
- Densify the concrete: Apply a concrete densifier to the floor to increase its hardness and staining resistance. Follow the manufacturer's instructions for application and drying time.
- Polish the edges: Use a hand grinder or a small polishing machine to polish the edges and corners of the floor that are difficult to reach with a larger machine.
Proper preparation sets the foundation for a successful concrete floor polishing project. Take your time during this stage to achieve the best results.
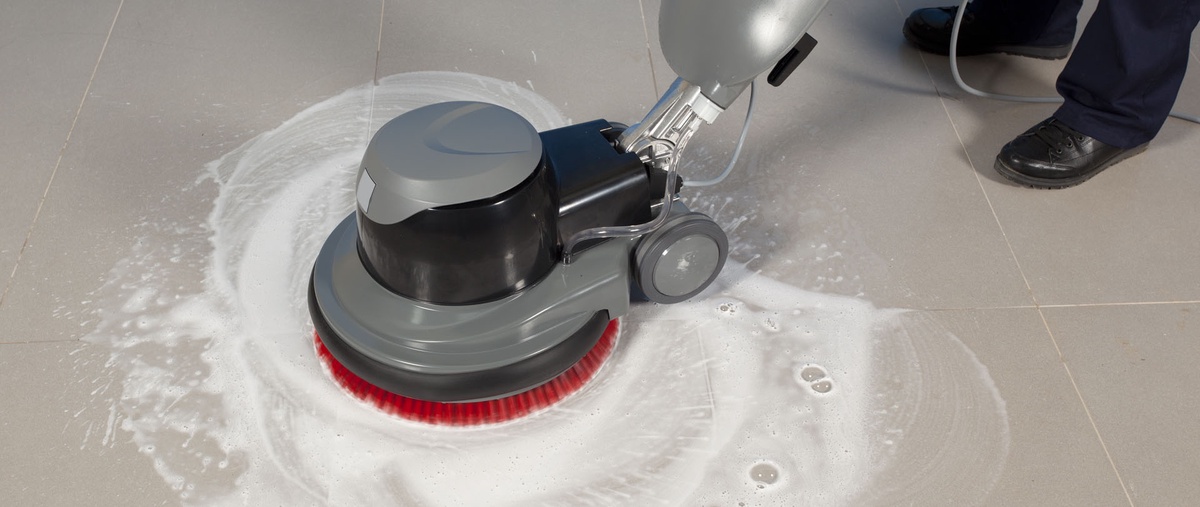
Tools and Equipment Needed for Floor Polishing
To get started with concrete floor polishing, you'll need the following essential tools:
- Concrete grinder: A high-quality concrete grinder with diamond grinding discs is crucial for achieving a smooth and even surface.
- Diamond pads: Different diamond pads with varying grit sizes are used for different stages of the polishing process. Coarser grits are used for grinding, while finer grits are used for polishing.
- Wet/dry vacuum: A wet/dry vacuum is necessary for removing dust and debris during and after the grinding and polishing process.
- Polishing machine: A polishing machine with rotating diamond pads is recommended for larger areas. This machine helps in achieving consistent results across the entire floor.
- Safety equipment: Protect yourself by wearing safety goggles, ear protection, a dust mask, and non-slip shoes. Additionally, consider using knee pads for added comfort during the polishing process.
Always follow the manufacturer's instructions and safety guidelines for each tool and equipment used. Safety should always be a priority.
Step-by-step Process of Concrete Floor Polishing
Now that we have prepared the floor and gathered the necessary tools, let's dive into the step-by-step process of concrete floor polishing:
Step 1: Assessing the condition of your concrete floor
Before you begin the polishing process, evaluate the condition of your concrete floor. Look for any remaining imperfections or areas that require further repair. It's crucial to address these issues before proceeding to ensure a smooth and flawless finish.
Step 2: Surface preparation
Clean the floor thoroughly using a vacuum or broom to remove loose debris. Repair any remaining cracks or imperfections using a suitable concrete patching compound. Once the repairs are complete, grind the floor using a concrete grinder to remove any remaining coatings or sealants and create a level surface.
Step 3: Choosing the right diamond pads/grits
Select the appropriate diamond pads for each stage of the polishing process. Coarser grits, such as 30 or 50, are typically used for grinding to remove any remaining imperfections. Switch to finer grits, such as 100 or 200, for polishing as you progress. The final stages may require even finer grits, such as 400 or 800, to achieve a glossy finish.
Step 4: Dry vs. wet polishing
There are two main techniques for concrete floor polishing: dry and wet polishing. Dry polishing involves using a dust shroud with a vacuum to collect the generated dust. Wet polishing, on the other hand, utilises water to cool the diamond pads and eliminate dust. Both methods have their advantages, so choose the one that suits your needs and preferences.
Step 5: Polishing process
Attach the appropriate diamond pad to the polishing machine and begin polishing. Start with the coarsest grit and gradually work up to finer grits. Move the machine in a back-and-forth or circular motion, overlapping each pass to ensure even polishing.
Step 6: Applying sealant or polish enhancer
Once the desired gloss level is achieved, apply a sealant or polish enhancer to protect and enhance the appearance of the polished floor. Follow the manufacturer's instructions for application and drying time. Regular maintenance and reapplication of the sealant will keep your polished concrete floor looking its best.
Conclusion:
In conclusion, concrete floor polishing Melbourne is an excellent choice for achieving a sleek and modern look in any space. By following the step-by-step process outlined in this guide, you can transform your concrete floor into a stunning focal point. Remember to prioritise safety, invest in the right tools, and maintain your polished floor regularly to enjoy its benefits for years. So, go ahead and explore the world of concrete floor polishing, experiment with different techniques, and create a beautiful and durable floor you can be proud of.
Source : The Ultimate Guide to Concrete Floor Polishing Techniques

No comments yet