If you are looking to connect your 192.168.188.1 WiFi extender then you are in the right place. Our guide will help you with easy steps that will quickly connect you to your 192.168.188.1 extender. This connection will allow you to say goodbye to weak signals and enjoy seamless coverage. Follow our instructions or call +1(855)201–8071 our experts for immediate assistance. Our experts will help you get relief from your extender problems. This guide will walk you through three simple methods to ensure a successful connection and enhance your wireless coverage.
Method 1: WPS (Wi-Fi Protected Setup)
- Locate the WPS Button: Most modern Wi-Fi extenders and routers come equipped with a WPS button. Locate this button on both devices.
- Press the WPS Buttons: Press the WPS button on your router, followed by the WPS button on your Wi-Fi extender. This initiates a secure connection between the two devices.
- Wait for the Connection: Allow a few moments for the devices to establish a connection. Once the WPS LED indicators stabilize, your Wi-Fi extender is successfully connected to 192.168.188.1.
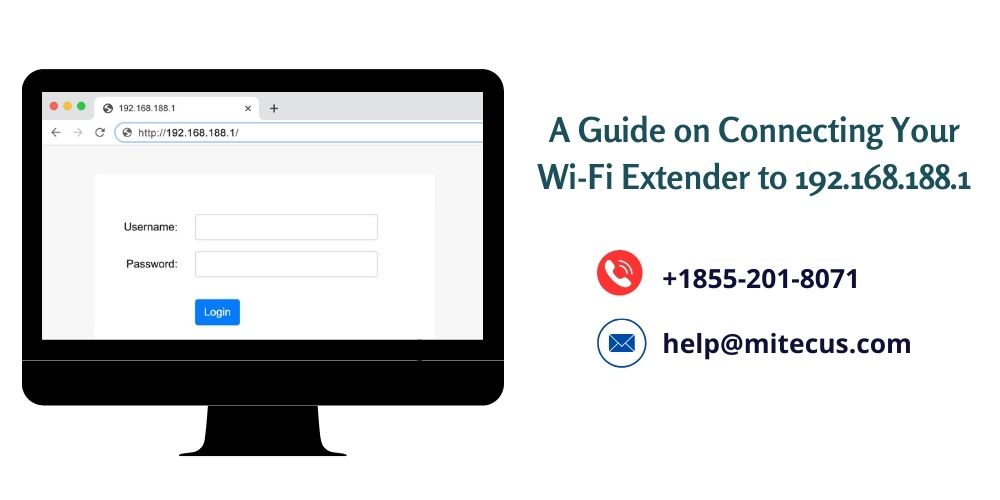
Method 2: Web Browser Configuration
- Connect to Wi-Fi Extender: Use your computer or mobile device to connect to the default Wi-Fi network of your extender. This is usually labeled with the device name or model.
- Open a Web Browser: Launch your preferred web browser and enter ‘192.168.188.1’ in the address bar. Press ‘Enter’ to access the extender’s web-based interface.
- Login and Configure: Enter the login credentials for your Wi-Fi extender. This information is often found on the device or in the user manual. Once logged in, navigate to the settings and configure the extender to connect to the 192.168.188.1 network.
- Save Settings: After configuring the settings, don’t forget to save the changes. The extender will then establish a connection to the specified network.
Method 3: Ethernet Cable Connection
- Connect the Extender: Use an Ethernet cable to physically connect your Wi-Fi extender to your computer. This establishes a direct connection for configuration.
- Access the Configuration Page: Open a web browser and enter ‘192.168.188.1’ in the address bar. Log in to the extender’s configuration page using the provided credentials.
- Configure and Save: Adjust the settings to connect the extender to the 192.168.188.1 network. Once configured, save the settings and disconnect the Ethernet cable.
Conclusion:
Enhancing your Wi-Fi signal with a Wi-Fi extender doesn’t have to be a daunting task. By following these three methods — WPS, web browser configuration, and Ethernet cable connection — you can easily connect your extender to the 192.168.188.1 gateway, ensuring a broader and more reliable wireless coverage for your network. Enjoy the benefits of an extended and strengthened Wi-Fi signal throughout your home or office.
Source Link: https://networktechblog.com/192-168-188-1/

No comments yet