The online world is constantly changing, and sometimes your website needs to change along with it. Whether you want a new look, improved features, or a different web address, the idea of migrating your website can be overwhelming. But don’t worry, brave adventurer! This complete website migration checklist will be your guide to confidently navigate the digital maze and come out victorious on the other side.
Inside these pages, you’ll discover a detailed plan for a seamless and successful migration, filled with practical steps, expert advice, and invaluable resources. We’ll walk you through each stage, from careful planning and getting ready for launch, to monitoring and optimizing your website after the migration.
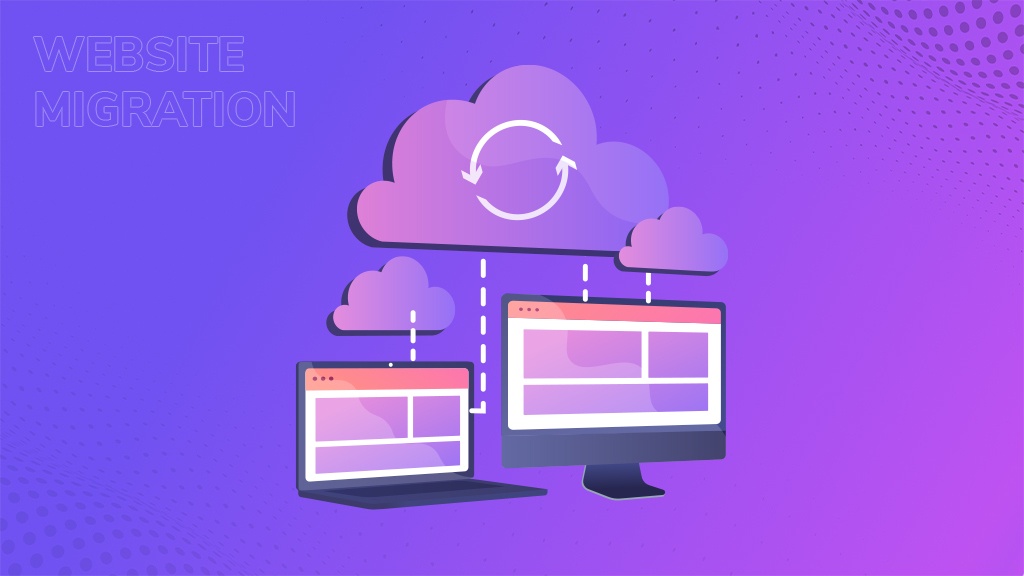
Definition of Website Migration
The process of website migration involves transferring your website from one platform or server to another. This includes tasks like changing hosting providers, updating the design and functionality of your website, or making any other necessary modifications.
Can SEO be impacted by Website Migration?
Website migration, although sometimes necessary, can pose a temporary obstacle for SEO. Nevertheless, the enduring advantages of a skilfully executed transition frequently surpass the initial decline in rankings. Shifting to a swifter and more secure platform aligns with Google’s fundamental principles of user experience and performance, potentially propelling your website to a higher position in search results as time progresses.
While the re-indexing procedure causes a temporary fluctuation in organic traffic, a thoroughly planned migration mitigates this disruption and aids in preserving your existing search engine position, thereby paving the way for additional SEO expansion.
Website Migration Checklist 1 – Planning and Data Gathering
1. Establishing a Solid Foundation: Planning and Data Collection
In order to ensure a seamless and successful website migration, it is essential to engage in meticulous planning and thorough data collection. This initial section of our website migration checklist will provide you with guidance on how to lay a strong foundation for your migration project.
2. Defining Objectives and Scope
i. Setting Goals and Timeline
Clearly articulate the reasons behind your migration and establish realistic timelines for each stage. Our website migration checklist can serve as a roadmap, outlining key milestones to keep you on track.
ii. Building the Team
Assemble a team of experts that includes webmaster engineers, SEO specialists, analysts, UX designers, and content specialists. Moreover, their diverse expertise will prove invaluable throughout the entire process.
3. Acquiring and Analyzing Data
i. Collecting Data
Gather comprehensive data about your current website for reference and analysis. Utilize a combination of tools such as Google Analytics and Semrush Suite to gain valuable insights.
ii. Setting up the Project
Within your chosen tools, create a dedicated project specifically for your migration. This will enable you to track progress, identify potential issues, and monitor performance.
iii. Assessing Website Health
Tools like Semrush’s Site Audit can provide a detailed analysis of your website’s health, identifying areas for improvement and potential SEO pitfalls to address during the migration process.
4. Create a Staging Environment
In order to facilitate the process of testing and refining your website, it is recommended to establish a duplicate version on a separate server or subdomain. This staging environment provides you with the opportunity to experiment with changes, compare different versions, and optimize your site before making it publicly available. Additionally, don’t forget to configure any content delivery networks (CDNs) for the staging environment.
5. Control Access to the New Site
It is crucial to prevent search engines from indexing the new site while it is still under development. Otherwise, it may appear in search engine results pages (SERPs) and compete with the existing version. Here are two effective methods to achieve this:
i. Robots.txt
Create a robots.txt file on the staging site to instruct search engine crawlers not to index any pages. However, make sure to grant access to necessary migration tools. For instance, the following robots.txt configuration allows Semrush Site Audit to crawl while blocking Googlebot.
User-agent: Googlebot

Disallow: /

User-agent: Semrushbot-SA

Allow: /
ii. Password Protection
Password-protect the staging site and configure Site Audit to bypass the restrictions by entering login credentials in its settings. This allows Site Audit to crawl despite the password protection remaining active for real users.
6. Ensuring Googlebot Access and Crawl Coverage
To ensure that Googlebot can access and crawl your test site, you need to integrate it with Search Console. This can be done by adding the temporary hostname of your subdomain to Search Console. By utilizing the Coverage report, you can make sure that all pages, including those with JavaScript content, are crawlable and indexed. It is important to note that this access for Googlebot should only be temporary and restricted once you have confirmed that there are no indexing issues.
7. Crawlability Assessment
To optimize your website’s discoverability on search engines, it is crucial to assess its crawlability. The Site Audit crawler is designed to mimic Googlebot’s behavior to a significant extent. By utilizing its Crawlability report, you can identify any pages that are not indexable or potential crawl budget waste. This proactive approach will help you optimize your website for better search engine visibility.
8. Detecting Potential Domain Penalty
If you have recently purchased a domain and are migrating your website to it, it is important to check for any past manual actions issued by Google. This can be done using the Manual Actions report in Search Console. By doing so, you can ensure that your new site is not penalized due to any actions taken by the previous owner. If there are any existing issues, it is important to address them by following Google’s recommendations to avoid potential drops in rankings.
9. Optimizing DNS Time-to-Live
While visitors access your site through the domain name, computers rely on IP addresses. The Domain Naming System (DNS) translates these domain names into IP addresses, facilitating the delivery of content. During website migrations that involve IP address changes, it is necessary to update the DNS records. However, this can potentially cause downtime. To minimize any disruption, it is recommended to adjust the Time-to-Live (TTL) values of your DNS entries before the migration. Lower TTL values expedite the DNS update process, reducing downtime. It is important to remember to revert the TTL values to normal once the migration is complete.
10. Assessing Server Performance
For Googlebot to efficiently recrawl your updated website, it is crucial to ensure a swift process. A slow server response time will result in a decreased crawling rate by Googlebot, consequently prolonging the time required for the entire website to be recrawled. Moreover, this will have a detrimental impact on the overall performance of your site, regardless of its optimization level.
On the other hand To guarantee that all pages on your site load quickly, access the Performance report within the Site Audit tool and utilize the Page (HTML) Load Speed widget.
11. Transfer the GA Tracking Code to Your Fresh Website.
To maintain historical data continuity and ensure accurate tracking on your new website, migrate your existing Google Analytics tracking code. This explicitly involves replicating the code snippet provided by Google Analytics on your old site and implementing it within the appropriate sections of your new website’s codebase.
Site Migration Checklist: Part 2 – URL Mapping and Redirects
1. Creating the List of URLs
i. Identify Key Pages
Prioritize your most valuable pages based on content, traffic, and backlinks.
ii. Leverage Existing Resources
Utilize sitemaps, Search Console, Google Analytics, and other tools to discover all URLs, including images and videos.
iii. Filter and Consolidate
Use Site Audit and Backlink Analytics to filter for pages with specific codes or backlinks. Position Tracking can reveal high-ranking pages. Therefore combine all data into a single, deduplicated list for efficient management.
2. Mapping URLs and Identifying Redirects
i. Match Old and New URLs
If your new site structure changes, map each old URL to its corresponding new counterpart.
ii. Redirect Necessity
Identify missing pages and determine which old URLs require 301 redirects to transfer traffic and PageRank to their new counterparts. Without proper redirects, SEO performance will suffer.
3. Implementing 301 Redirects
i. Missing Page Solutions
For missing pages, find relevant destinations on your new site to receive traffic from existing links.
ii. Server-Side Redirects
Ensure you use server-side 301 redirects for optimal performance and SEO benefits. This ensures old URLs are excluded from indexing and redirects remain functional even after switching hosting providers.

Website Migration Checklist 3 – Implementing the Migration and Enhancing Post-Launch Performance
1. Comprehensive URL Updates
To ensure a successful migration, it is crucial to meticulously update the URLs. Here are some steps to follow:
i. HTML/Sitemap Annotations
Update the internal annotations by adding self-referencing rel=”canonical” tags for each URL. This helps search engines understand the preferred version of your content.
ii. Multilingual Content
Implement rel-alternate-hreflang annotations for language-specific pages. This helps search engines serve the correct language version of your website to users.
iii. Mobile Adaptation
Utilize rel-alternate-media annotations for mobile versions of your website. This ensures that mobile users are directed to the appropriate version of your site.
iv. Internal Link Adjustments
Modify all internal links on the new site, replacing old URLs with their corresponding new counterparts. This ensures that users are directed to the correct pages and helps maintain SEO rankings.
v. External Link Inventory
Create a directory of websites linking to your content and separate sitemaps containing both old and new URLs. This will make it easier to make any necessary adjustments in the future.
2. Phased Migration for Enhanced Control
For large websites, it is recommended to adopt a phased migration approach. This involves migrating content into smaller batches, which reduces the risk of errors and simplifies troubleshooting. After each phase, thorough testing should be conducted to ensure a smooth transition.
3. Backup and Site Status Documentation
Taking precautions is essential during a migration. Here are some steps to consider:
i. Site Status Snapshot
Capture a comprehensive record of your current site’s status. This will help with analysis and problem resolution in case any unforeseen issues arise during the migration.
ii. Content Backup
Make secure backups of all website content, including meta tags and titles. Depending on your configuration, you can utilize hosting platform tools or CMS plugins to perform this task.
4. DNS Setting Update
If you are switching servers, it is important to update your DNS settings to direct traffic to the new IP address. Collaborate with your hosting provider to ensure a smooth transition during this critical step.
i. Ongoing Website Performance Monitoring
The process doesn’t stop once the migration is complete. It is essential to continuously monitor the performance and SEO health of your website. Take advantage of Semrush tools such as Notes and Position Tracking to establish a strong monitoring system for your website’s ongoing success.
ii. Identifying Fresh Issues
Run another Site Audit campaign to evaluate any changes in the number of issues after the migration. Analyze the “Compare Crawl” tab to identify any new problems that have emerged or any existing issues that have been resolved since the previous audit.
iii. Prioritizing Page Load Speed
After the migration, the speed at which your pages load becomes crucial. Ensure that all pages load quickly to facilitate efficient indexing by Googlebot. Optimize server performance as Googlebot adjusts its crawling rate based on the speed of your website.
iv. Tracking New Page Indexing
Upload separate sitemaps that include both the old and new URLs to Google Search Console (if you haven’t done so already). This allows you to monitor the removal of old URLs and the addition of new ones to the index. Furthermore, aim for a final state where only the new URLs are indexed.
v. Tracking Positions and Recovery
Expect temporary drops in rankings after the migration, but anticipate a swift recovery. If your rankings haven’t bounced back within a few weeks, conduct a comprehensive analysis to identify the underlying cause.
vi. Discontinuing Old Hosting
Once Google has finished indexing your new website, consider canceling your old hosting subscription. Make sure that all 301 redirects are functioning correctly, redirecting users away from the discontinued server.
Troubleshooting Guide
If you observe any abnormalities in audience behavior or consistent declines in ranking and traffic, please follow these troubleshooting steps:
1. Analyze Traffic Distribution
Determine whether the loss of traffic is evenly spread across all pages or if it is concentrated on specific ones.
2. Identify the Source of Traffic Loss
Pinpoint the exact cause of the decline in traffic. Double-check redirects to identify any potential losses related to backlinks or advertisements. Utilize Position Tracking to analyze changes in organic traffic and rankings.
3. Check for Technical Issues
If multiple pages are affected, run a Site Audit again to identify any new technical issues that may be impacting performance. Follow the guidance provided by the tool to resolve these issues.
4. Compare Content
For pages that have experienced drops in rankings, compare the content and meta tags after migration with the backups to identify any potential discrepancies.
Conclusion
Undertaking a website migration may seem overwhelming, but by carefully strategizing and executing the process, you can ensure a smooth and successful transition that enhances your online presence. Overall this comprehensive checklist has equipped you with the necessary knowledge and tools to navigate each step of the journey, from meticulous planning to post-launch monitoring.

No comments yet