Sand casting is a versatile and ancient method of creating metal parts by pouring molten metal into a sand mold. It's a process that has been refined over centuries and continues to be widely used in various industries due to its cost-effectiveness and adaptability. In this guide, we'll walk you through the steps of sand casting parts, from pattern creation to finishing touches, ensuring that you can produce high-quality parts with confidence.
-
Design and Pattern Creation: Begin by designing the part you wish to sand casting parts and creating a pattern. This pattern can be made from various materials such as wood, metal, or even 3D-printed plastic. Ensure that the pattern is slightly larger than the desired final part size to account for shrinkage during the casting process.
-
Preparing the Mold: Select high-quality sand and mix it with a binder to create a mold that will hold its shape during casting. Ram the sand mixture into a flask around the pattern, creating a two-part mold. Carefully remove the pattern, leaving a void in the sand that matches the shape of the desired part.
-
Creating Channels and Vents: Introduce channels and vents into the mold to allow for the smooth flow of molten metal and the release of gases during casting. These can be created using additional patterns or by hand carving the sand.
-
Melting and Pouring Metal: Choose the appropriate metal for your part and melt it in a furnace to the required temperature. Once molten, carefully pour the metal into the mold, ensuring that it fills the cavity completely without causing turbulence or air bubbles.
-
Cooling and Solidification: Allow the metal to cool and solidify within the mold. This process may take several minutes to hours depending on the size and complexity of the part as well as the type of metal being used.
-
Removing the Casting: Once the metal has cooled, carefully remove the sand mold to reveal the raw casting. Use tools such as hammers, chisels, or sandblasting equipment to clean any excess sand or imperfections from the surface of the casting.
-
Finishing and Machining: Depending on the desired final specifications, the casting may require additional machining or finishing processes such as grinding, milling, or polishing to achieve the desired surface texture and dimensional accuracy.
-
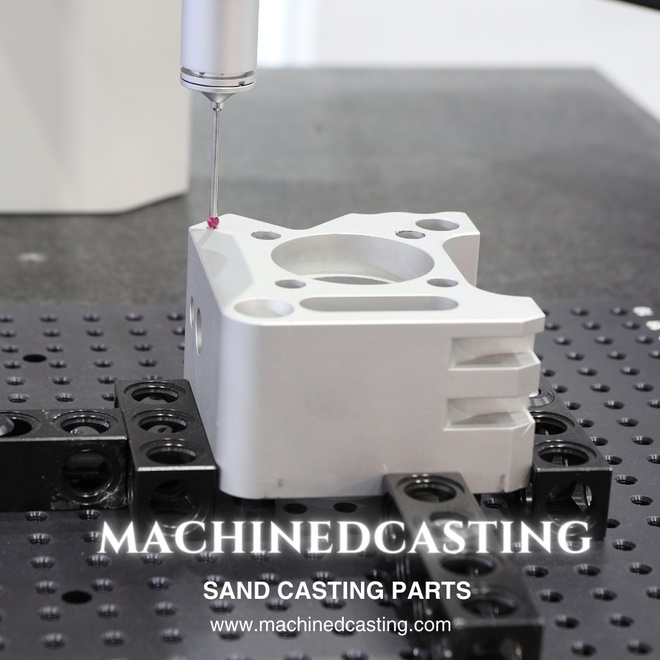
Inspection and Quality Control: Thoroughly inspect the finished sand casting parts for any defects or imperfections that may affect its performance or integrity. Use techniques such as visual inspection, dimensional measurement, and non-destructive testing to ensure that the part meets the required standards.
-
Post-Casting Treatment: Depending on the application and material used, the sand casting parts may require additional treatment such as heat treatment, surface coating, or painting to enhance its properties and durability.
-
Documentation and Feedback: Keep detailed records of the casting process, including any adjustments made to the mold or casting parameters, to facilitate future improvements and ensure consistency in production.
By following these steps and paying attention to detail, you can produce high-quality parts through sand casting parts that meet your specifications and performance requirements. Experimentation, practice, and continuous learning will further refine your skills, allowing you to unlock the full potential of this time-tested manufacturing technique.

No comments yet