Drawing Leaves on a Tree - Step by Step Guide: If you go into nature, there are many beautiful sights to see. One of the most attractive pictures in nature is a tree full of beautifully coloured leaves! Since a tree is made up of thousands of individual leaves, mastering how to draw leaves on a tree can be difficult due to the complex spirit of all these separate parts. Yet, if you understand what to do and have a few steps, you can easily recreate the fantastic view of tree leaves!
you can learn more drawing ideas like 3D drawing, animal drawing, cartoon drawing, human drawing, etc. This step-by-step guide to drawing leaves on a tree will show you how to draw your foliage.
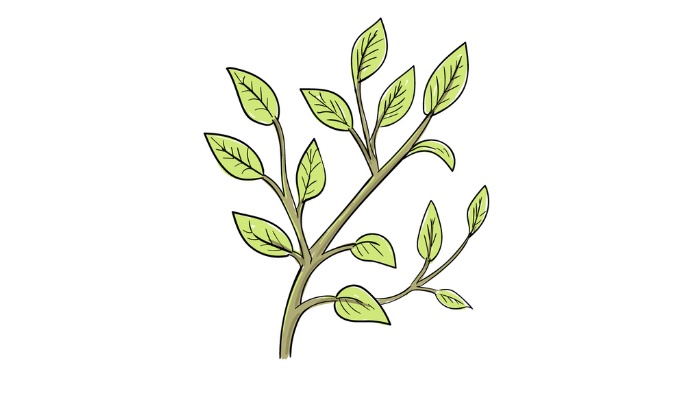
Draw Leaves on a Tree
Step 1
In this first phase of our direction on how to draw leaves on a tree, we won't be drawing any leaves. At least not yet! Instead, we'll draw some branches and twigs to which the leaves will be attached. You can do this by creating a series of curved lines that form these branches. The line on the left will be broken as a curved line, and on the right, you can draw a small protruding stick, as shown in our reference image. Once you have this part ready, we can add it to the next steps!
Step 2
For this second element of your leaves on the tree sketch, we'll continue what you did in the previous step to lengthen the branch. The branch will have a long main part with many smaller branches coming out of it. It may look quite complicated in our reference image, but if you slow it down, you should have no problem replicating what our example looks like.
Step 3
You have come to this guide to draw leaves, and you can mark the first step in our tutorial on drawing leaves on a tree! You can sketch the sooner leaf on the lower right branch from the first step. Once you clear this sheet, you can move the unit behind it and further from the main branch. This small branch behind the leaf will also stick out some small units.
Step 4
You can add many leaves to the picture in this part of your leaves on the tree drawing! For this step, you will mostly add more leaves to the smaller branches you drew in the previous actions. You will add 6 new leaves at this stage, and your branch will look complete.
Step 5
You can finish drawing all the leaves on this branch for this fifth step of our tutorial on drawing leaves on a tree. These leaves are attached to any remaining bare branches of the branch. You need to add seven sheets to match our reference image. Now that you've drawn all the leaves, all that's left to do is add some final details!
Step 6
You did a great job drawing all those branches and leaves, and this part of your leaves on the tree drawing is where you can add some final little details. These details mainly consist of a few veins on each leaf. To do this, draw a centre line through each sheet, then draw some smaller lines from that centre line. This is enough for all our details, but feel free to add your additional information and elements! You can draw small flowers on the branch or draw lines on the branch for wood detail. How are you going to finish this drawing before the final coloring step?
Step 7
You have reached step seven of this focus on how to draw a tree. This step is all about telling yourself with beautiful colors for your drawing. As you can see in our reference image, we used a simple but elegant brown and green colour palette. You can choose this shape for your drawing, but you can also select many other options! If you want more vibrant and warm colours, you can make it an autumn tree using orange and red for the leaves.
When you colourize your image, you have many options that you can use to colourize it. Using a more subdued medium like watercolours or coloured pencils can be pretty for nature-themed photos, but whatever you use will look amazing!
Learn more: Leaves on a Tree,

No comments yet