Shopify's basic feature is email templates. With email templates, you can communicate with a large number of customers in a short period of time. However, before you send them to customers, you must first learn how to customize specific email templates.
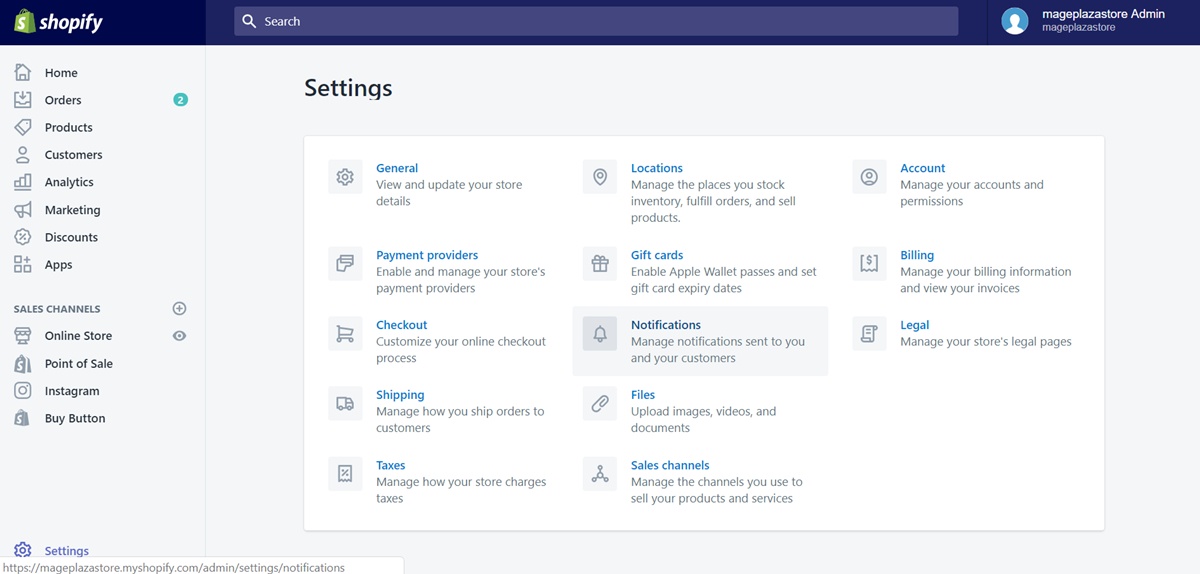
Step 1: Go to Settings, select Notifications
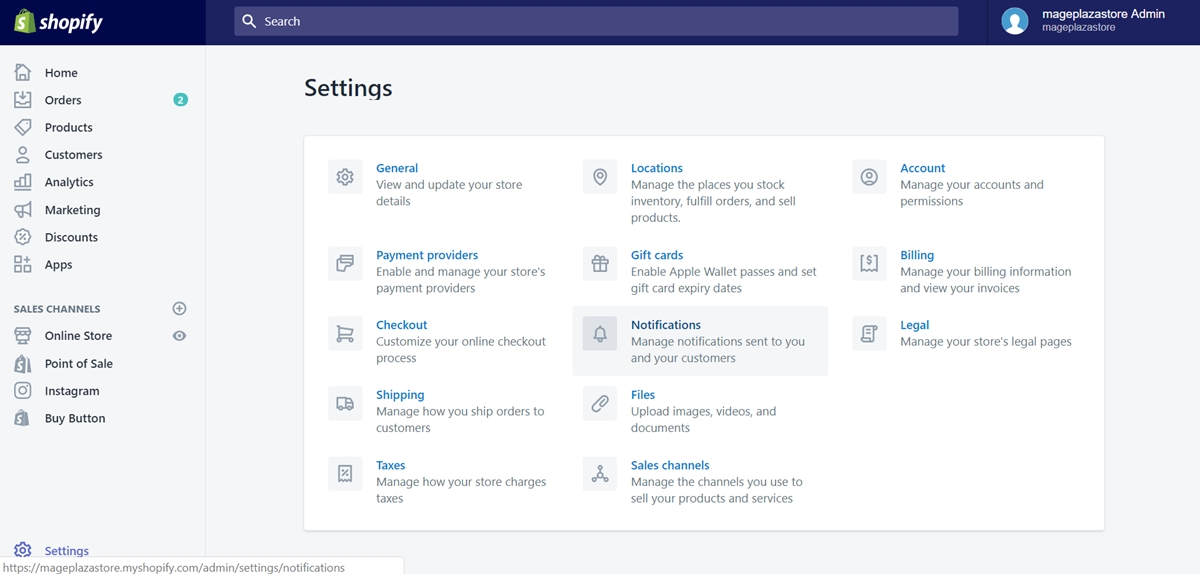
When you successfully access the Shopify admin interface, click on Settings with a gear icon at the bottom left corner of the interface. Once you do, select Notifications on the menu.
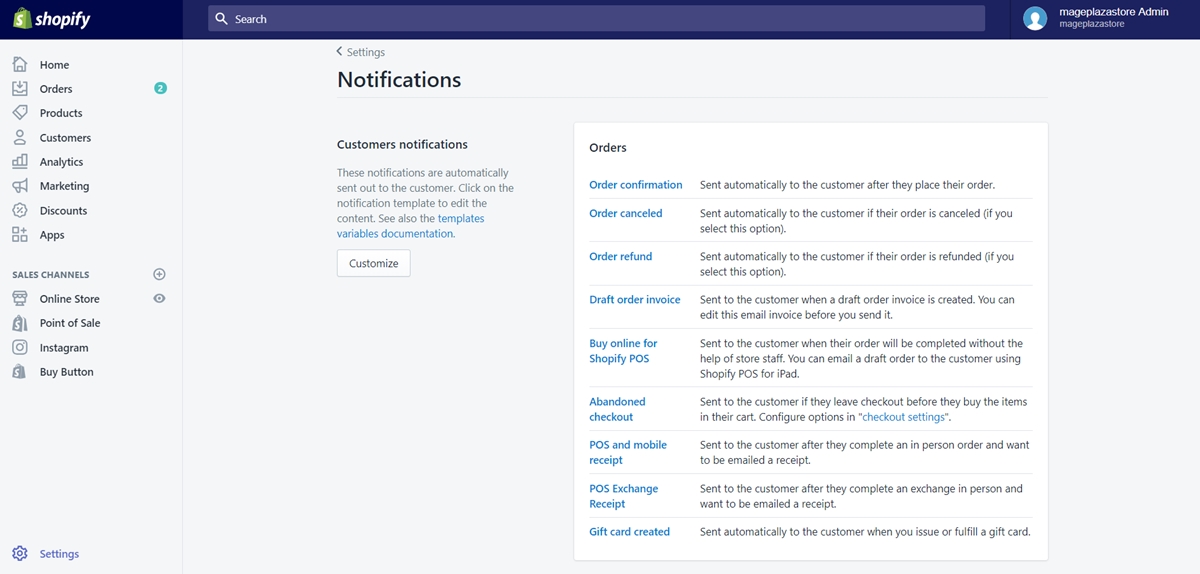
Step 2: Select the specific template you want to edit
There are several types of notifications in the Customer notifications area on the right side, such as Orders, Shipping, and Customer. To begin editing, click on each blue line of a specific notification.
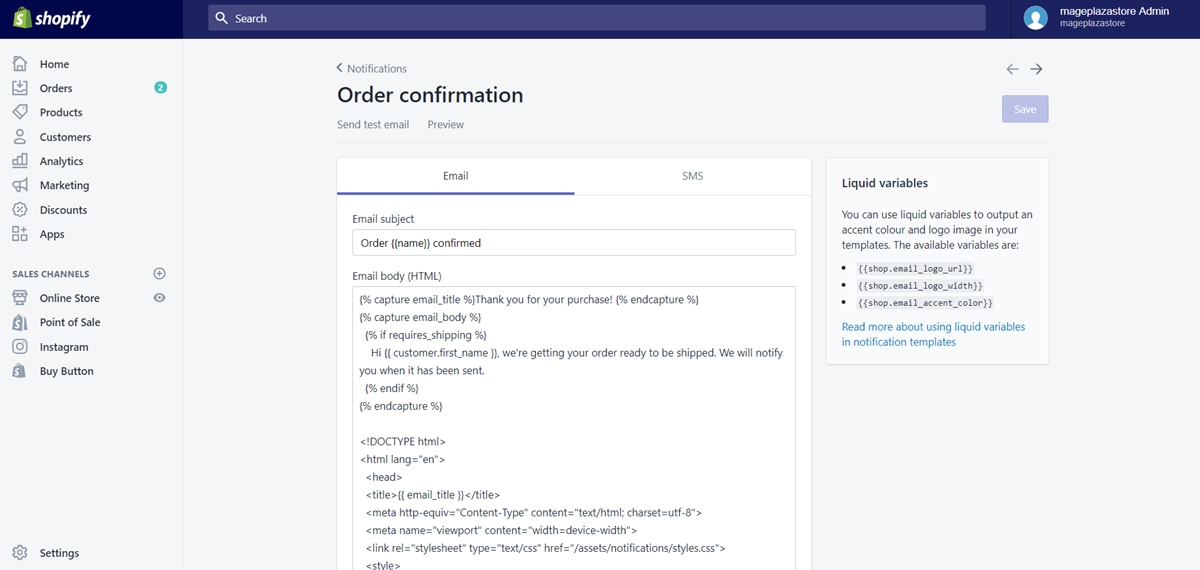
Step 3: Start customizing email templates
After selecting a template, you will be directed to a new sector for drafting. You can also change the Email subject and body from here.
Step 4: Save your changes
When you're finished editing, go over the entire template to ensure there are no errors. Scroll all the way to the bottom of the page.
Click Save to confirm your changes. You are also able to Revert to default if you want to decline those changes.
Summary
You can easily customize specific email templates with Shopify. An email template is a useful tool for online store management on most platforms that connect to the internet. It keeps the lines of communication open between the store owner and the customers.
However, keep in mind that you must edit the codes precisely and always check Preview to ensure the quality of the notification before sending it to your dear customers.

No comments yet