Have you ever wondered why certain websites load incredibly fast while yours seems to be moving at a snail’s pace? The solution may lie in a clever technique known as GZIP compression. This ingenious tool compresses your website’s files, enabling them to travel swiftly across the internet and appear on your visitors’ screens in an instant. Intrigued? Delve into this comprehensive guide and uncover how GZIP can revolutionize your WordPress site, propelling it from a sluggish snail to a lightning-fast cheetah, and leaving your competitors in the dust.
Understanding GZIP Compression
GZIP compression, a method derived from GNU Zip, is a prevalent technique for lossless data compression widely employed on the internet. It is employed to diminish the size of essential website components such as HTML pages, stylesheets, and scripts. This optimization contributes to faster page loading times and reduced bandwidth consumption.
The process of GZIP compression surely involves a combination of LZ77 encoding and Huffman coding algorithms. These algorithms work in tandem to identify and eliminate redundant data within a file, leading to a substantial reduction in file size while maintaining data integrity.
Moreover, GZIP compression enjoys universal support from leading web browsers and servers. Therefore, it presents a convenient and effective means to enhance website performance and optimize data transfer across the web.
How does GZIP Compression work in Compressing Data?
GZIP compression, a lossless data compression technique, is an intricate process designed to enhance the efficiency of file storage and transmission. To grasp this concept better, let’s break it down into key points:
1. Foundation in D EFLATE Algorithm
GZIP compression is surely rooted in the DEFLATE algorithm, a sophisticated combination of two fundamental encoding techniques: LZ77 encoding and Huffman coding.
2. LZ77 Encoding
LZ77 encoding is the first step in GZIP compression. It functions by detecting recurring sequences of bytes within a file. Instead of repeating these sequences, LZ77 encoding replaces them with pointers to their earlier occurrences. Furthermore, this ingenious approach leads to substantial reductions in file sizes, especially in data with considerable redundancy, like text and HTML files.
3. Huffman Coding
Following LZ77 encoding, GZIP utilizes Huffman coding, the second step of the process. Huffman coding assigns shorter binary codes to bytes that appear frequently in the file, while less common bytes are associated with longer codes. The advantage lies in the fact that shorter codes consume fewer bits, thus further reducing the overall file size.
4. Sequential Compression
GZIP surely employs a two-step process for compression. First, it identifies and eliminates redundant data through LZ77 encoding. Then, it optimizes the file further by utilizing Huffman coding to assign shorter codes to frequently occurring bytes.
5. File Extension
Once compression is complete, GZIP appends the .gz file extension to the compressed file, distinguishing it from the original.
In essence, GZIP compression enhances data storage and transfer efficiency by intelligently reducing file sizes through the elimination of redundancy and the use of optimized encoding techniques. Furthermore, it plays a pivotal role in enhancing web page loading times and optimizing bandwidth usage.
Key Benefits of GZIP Compression
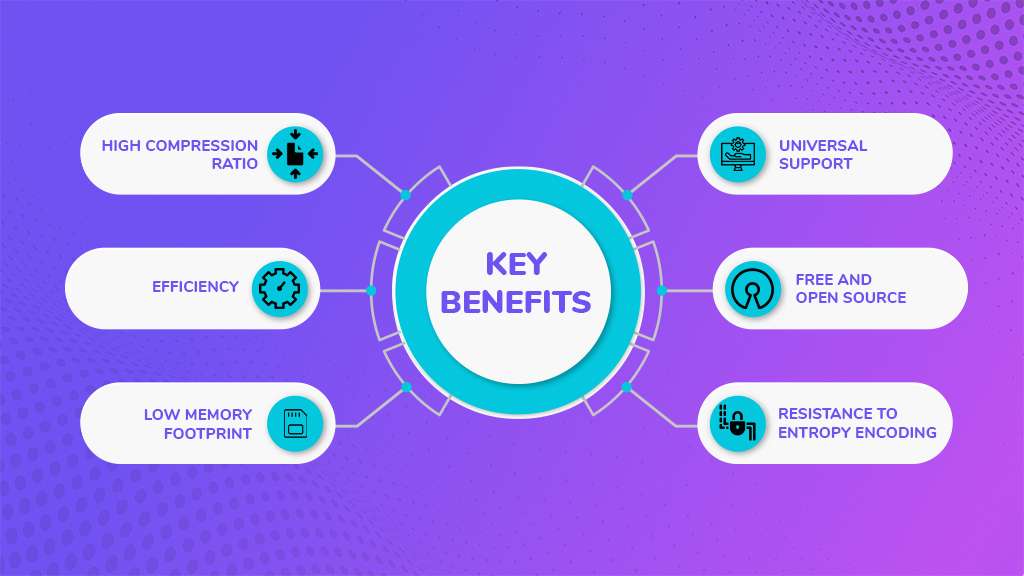
GZIP compression, a widely adopted lossless data compression method, boasts a range of advantages that set it apart from other compression algorithms. These six key benefits include:
1. High Compression Ratio
GZIP excels in reducing the size of text-based resources, typically achieving compression ratios of 70-90%. On the other hand, this substantial reduction in file size enhances page loading speed and minimizes bandwidth consumption.
2. Efficiency in Compression and Decompression
GZIP’s efficiency shines through in its swift compression and decompression processes. This significantly makes it an ideal choice for on-the-fly compression in HTTP servers and data streams, ensuring seamless performance.
3. Low Memory Footprint
GZIP compression is likewise renowned for its minimal memory footprint, making it a favored option for servers and systems with limited memory capacity. In fact, this characteristic has made it a popular choice among web hosting providers.
4. Resistance to Entropy Encoding
While lossless compression algorithms can experience reduced compression ratios as data entropy increases, GZIP stands resilient. Henceforth, it maintains effective compression ratios even for highly compressed data, offering consistent performance.
5. Free and Open Source
GZIP compression is both free and open source, meaning it can be utilized without any licensing or patent restrictions. This accessibility makes it a versatile choice for a wide range of projects, whether commercial or non-commercial.
6. Universal Support
Above all, GZIP compression enjoys widespread support across virtually all web servers and clients. This universal compatibility significantly ensures that implementing GZIP compression on your website is a hassle-free process, without concerns about compatibility issues.
How to Verify GZIP Compression Activation?
In the realm of website optimization, GZIP compression surely stands as a reliable method for improving performance. To ascertain whether GZIP compression is operational on your website, several techniques can be employed by all means:
1. Online GZIP Compression Test Tools
Numerous online tools are at your disposal to evaluate the status of GZIP compression on your website. A selection of popular options particularly includes:
- GZIP Compression Checker
- HTTP Compression Test
Utilizing these tools is a straightforward process. Enter your website’s URL, then initiate the examination by clicking the “Check” or “Test” button. These tools will subsequently furnish a report detailing the status of GZIP compression, along with an estimate of the potential data savings achievable through the utilization of GZIP compression.
i. Browser Developer Tools
- Another approach is to utilize the developer tools within your web browser to verify the GZIP compression status on your website. Follow these steps:
- Launch the developer tools and access the Network tab.
- Refresh the webpage in question.
- Select one of the listed HTTP requests.
- In the Response Headers section, inspect the Content-Encoding header. If it indicates “gzip,” GZIP compression is indeed enabled.
ii. Server Configuration Files
For those who possess access to their website’s server configuration files, a different method is available. To ascertain the GZIP compression status, consult the server’s configuration files. In Apache configuration files, look for the presence of the mod_deflate module. In Nginx configuration files, examine the gzip directive. When these components are active, GZIP compression is confirmed to be in operation.
2. Verification Using the Content-Encoding: gzip HTTP Response Header
An additional method for confirming the utilization of GZIP compression on a website involves inspecting the “content-encoding: gzip” HTTP response header. You can readily achieve this by accessing your web browser’s developer tools and navigating to the Network tab. Afterward, reload the webpage and select one of the listed HTTP requests. In the Response Headers section, examine the Content-Encoding header. If this header displays “gzip” as its value, it serves as confirmation that GZIP compression is actively enabled.
For a more comprehensive view of the web page’s transformation, consider activating the “Use large request rows” option available in the Chrome DevTools settings panel. By doing so, you can readily compare both the original and compressed sizes of the page. As exemplified in the subsequent screenshot, the application of GZIP compression results in a substantial reduction of the original page’s size, from 118 KB to a mere 22.9 KB:
3. Webpage Speed Testing Tools
Numerous website speed testing tools offer the added benefit of issuing alerts when GZIP compression is not used on a website. Hence these tools recognize that GZIP compression is a straightforward yet highly effective approach to enhancing website performance. Among the well-regarded options for website speed testing are:
- PageSpeed Insights
- GTmetrix
- Pingdom Tools
- WebPageTest
On the other hand, employing these tools can provide a comprehensive evaluation of a website’s performance and highlight any areas that may benefit from implementing GZIP compression.
How to Activate GZIP Compression?
Enabling GZIP compression on your web server is essential to enhance website performance. Above all the process of activation varies depending on the specific web server software hosting your website. Here are two primary methods for enabling GZIP compression:
1. Utilizing a WordPress Plugin to Enable GZIP Compression
One of the most straightforward approaches to enable GZIP compression on a WordPress site involves the use of a caching or performance optimization plugin. For instance, if your WordPress website is hosted on an Apache web server, the W3 Total Cache plugin offers an option to activate GZIP compression within its Browser Cache settings panel. Similarly, the WP Rocket plugin automatically implements GZIP compression rules. These plugins activate GZIP compression by incorporating Apache’s mod_deflate module into the .htaccess file.
It is important to note that WordPress plugins require authorization to modify files on your web server. Should they lack the requisite permissions, they will not function properly and may display an error message. In such cases, it is advisable to reach out to your hosting provider or manually adjust your web server’s configuration files by employing the provided code snippets.
2. Allow GZIP Compression on Apache Web Server
As reported by Netcraft, Apache indeed ranks as the most widely utilized web server software worldwide. Notably, it is one of the two recommended web servers for WordPress.
Two options exist for editing Apache’s server configuration files, contingent upon your level of access:
- Firstly access to the primary server configuration file (typically named httpd.conf) is recommended for configuring Apache, as .htaccess files can potentially hinder Apache’s performance.
- In cases where access to the primary server configuration file is restricted, which is often the situation with shared hosting providers for WordPress, configuring Apache necessitates the use of a .htaccess file.
The former option is generally reserved for sysadmins, given that hosting providers seldom grant customers access to the main server configuration file. A comprehensive explanation of this process is beyond the scope of this article; however, you may refer to sample Apache server configurations from the HTML5 Boilerplate project and consult the Apache documentation for guidance.
3. Process to Enable GZIP on the Apache Web Server
To begin, access your WordPress site’s root directory via SFTP or your hosting provider’s online file manager. Insert the provided code snippet into the .htaccess file located there. Overall, it’s important to ensure that the mod_filter module is active on your server, as this is usually enabled by default with most hosting providers. If it’s not active, the AddOutputFilterByType directive may not function correctly, potentially leading to an HTTP 500 error. In case of any issues after implementing the code, check your server’s error logs for troubleshooting.
Code Snippet 1
  # Compress HTML, CSS, JavaScript, Text, XML and fonts

  AddOutputFilterByType DEFLATE application/javascript

  AddOutputFilterByType DEFLATE application/rss+xml

  AddOutputFilterByType DEFLATE application/vnd.ms-fontobject

  AddOutputFilterByType DEFLATE application/x-font

  AddOutputFilterByType DEFLATE application/x-font-opentype

  AddOutputFilterByType DEFLATE application/x-font-otf

  AddOutputFilterByType DEFLATE application/x-font-truetype

  AddOutputFilterByType DEFLATE application/x-font-ttf

  AddOutputFilterByType DEFLATE application/x-javascript

  AddOutputFilterByType DEFLATE application/xhtml+xml

  AddOutputFilterByType DEFLATE application/xml

  AddOutputFilterByType DEFLATE font/opentype

  AddOutputFilterByType DEFLATE font/otf

  AddOutputFilterByType DEFLATE font/ttf

  AddOutputFilterByType DEFLATE image/svg+xml

  AddOutputFilterByType DEFLATE image/x-icon

  AddOutputFilterByType DEFLATE text/css

  AddOutputFilterByType DEFLATE text/html

  AddOutputFilterByType DEFLATE text/javascript

  AddOutputFilterByType DEFLATE text/plain

  AddOutputFilterByType DEFLATE text/xml

  # Remove browser bugs (only needed for ancient browsers)

  BrowserMatch ^Mozilla/4 gzip-only-text/html

  BrowserMatch ^Mozilla/4\.0[678] no-gzip

  BrowserMatch \bMSIE !no-gzip !gzip-only-text/html

  Header append Vary User-Agent
At this point, your web server will efficiently deliver compressed files for all the file extensions indicated earlier. Verification of this compression can be conducted using any of the previously mentioned methods.
Should you seek to safeguard against potential interference with GZIP compression caused by client-side proxies and security software, you have the option to replace the preceding code snippet, especially with the one provided below.
Code Snippet 2
  # force compression for clients that mangle 'Accept-Encoding' request headers


    SetEnvIfNoCase ^(Accept-EncodXng|X-cept-Encoding|X{15}|~{15}|-{15})$ ^((gzip|deflate)\s*,?\s*)+|[X~-]{4,13}$ HAVE_Accept-Encoding
    RequestHeader append Accept-Encoding "gzip,deflate" env=HAVE_Accept-Encoding


  # compress all output with one of the following file extensions

    AddOutputFilterByType DEFLATE "application/atom+xml" \
                                  "application/javascript" \
                                  "application/json" \
                                  "application/ld+json" \
                                  "application/manifest+json" \
                                  "application/rdf+xml" \
                                  "application/rss+xml" \
                                  "application/schema+json" \
                                  "application/geo+json" \
                                  "application/vnd.ms-fontobject" \
                                  "application/wasm" \
                                  "application/x-font-ttf" \
                                  "application/x-javascript" \
                                  "application/x-web-app-manifest+json" \
                                  "application/xhtml+xml" \
                                  "application/xml" \
                                  "font/eot" \
                                  "font/opentype" \
                                  "font/otf" \
                                  "font/ttf" \
                                  "image/bmp" \
                                  "image/svg+xml" \
                                  "image/vnd.microsoft.icon" \
                                  "text/cache-manifest" \
                                  "text/calendar" \
                                  "text/css" \
                                  "text/html" \
                                  "text/javascript" \
                                  "text/plain" \
                                  "text/markdown" \
                                  "text/vcard" \
                                  "text/vnd.rim.location.xloc" \
                                  "text/vtt" \
                                  "text/x-component" \
                                  "text/x-cross-domain-policy" \
                                  "text/xml"


# define and map media types to their appropriate encoding type
  # Using SVG format (Scalable Vector Graphics) is highly recommended to
  # load logos, icons, text, and simple images. You can compress .SVG files
  # further using GZIP to create .SVGZ files. However, most browsers don’t
  # know that they need to decompress them first if they’re not served
  # without an appropriate ‘content-encoding’ HTTP response header. Thus,
  # these images wouldn’t show up in the browser. Hence, this module.


    AddType image/svg+xml svg svgz
    AddEncoding gzip svgz
3. Enabling GZIP on Nginx Web Server
According to Netcraft, Nginx is the most widely used web server for web-facing computers. If the current trajectory persists, it will soon surpass Apache as the most used web server for active sites.
In general, to enable GZIP compression on your Nginx web server, utilize the directives specified within the ngx_http_gzip_module. Begin by incorporating the directives outlined below into your nginx.conf file, which is typically located at /etc/nginx/nginx.conf on your server.
# enables GZIP compression
gzip on;

# compression level (1-9)
# 6 is a good compromise between CPU usage and file size
gzip_comp_level 6;

# minimum file size limit in bytes to avoid negative compression outcomes
gzip_min_length 256;

# compress data for clients connecting via proxies
gzip_proxied any;

# directs proxies to cache both the regular and GZIP versions of an asset
gzip_vary on;

# disables GZIP compression for ancient browsers that don't support it
gzip_disable "msie6";

# compress outputs labeled with the following file extensions or MIME-types
# text/html MIME-type is enabled by default and need not be included
gzip_types
application/atom+xml
application/geo+json
application/javascript
application/x-javascript
application/json
application/ld+json
application/manifest+json
application/rdf+xml
application/rss+xml
application/vnd.ms-fontobject
application/wasm
application/x-web-app-manifest+json
application/xhtml+xml
application/xml
font/eot
font/otf
font/ttf
image/bmp
image/svg+xml
text/cache-manifest
text/calendar
text/css
text/javascript
text/markdown
text/plain
text/xml
text/vcard
text/vnd.rim.location.xloc
text/vtt
text/x-component
text/x-cross-domain-policy;
Conclusion
To sum up, GZIP compression is an effective technique for improving the speed and functionality of your WordPress website. GZIP consequently makes your website’s files smaller, which improves user experience, speeds up loading times, and uses less bandwidth. The advantages of using GZIP compression are great, and the method is not too difficult. With the information and resources in this article, you can efficiently use GZIP compression to speed up. Improve the user experience of your WordPress website so that it gives users a better, faster experience.

Comments (1)