The TP Link AC750 setup is a simple process. Because the login and setup processes are simplified and simple, anyone and everyone can complete the entire setup process. Because we are frequently asked about it, we wanted to explain the entire setup process to make it easier for buyers.
So first starting with the connections:-
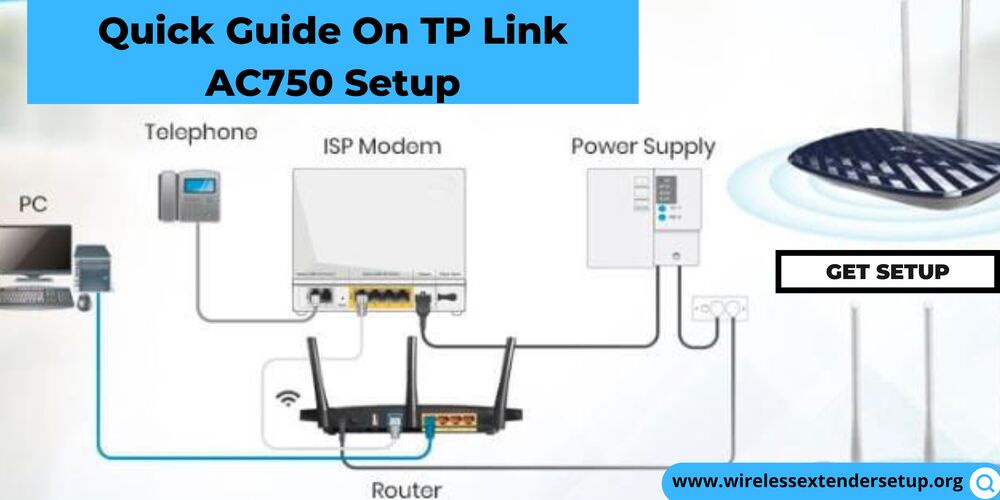
To begin the connection process, we must first ensure that the router is placed in a relatively safe location. Places with moisture or heat, as well as those with high electromagnetic interference, should be avoided.
Connect the router using the following steps:
Step 1: First, turn off your modem and remove the device's battery backup.
Step 2: Next, connect the Ethernet cable to the router's WAN port.
Step 3: Now restart the router and wait for at least 2 minutes before making any changes.
Step 4: Locate the power adapter and connect it to the device.
To begin the setup process, we would need to connect your PC to the router. This can be accomplished by using either a wired or wireless connection. It is, however, recommended that all setup be done via a wired connection. Turn off your device's Wi-Fi adapter and connect the router to the computer using an Ethernet cable from the router's WAN port to the PC's LAN port. To connect the device wirelessly, enter the SSID and password printed on the bottom label of your router.
Next, we must begin the configuration process by accessing the web-based router setup page from any browser on the connected device.
The steps to follow would be:-
Step 1: Configure the TCP/IP protocol on the computer to receive the IP address dynamically or automatically.
Step 2: Go to the router setup page at http://tplinkwifi.net. To log in, enter "admin" as the Username and Password.
Step 3: After logging in, you will be presented with a screen that prompts you to select the quick setup option.
Step 4: To begin the quick setup process, select the connection type. If you are unsure, select auto-detect. This will direct you to the next set of information.
Step 5: You will be prompted to enter the SSID and password for both available bands, as well as the security type. WPA2 Personal is always advised.
Step 6: All of the settings you've chosen will be displayed to you, and you'll be asked if you want to save them. Save the settings and restart the device.
With that, your TP-Link AC750 Setup is ready to be used to meet your needs and provide you with an enjoyable web browsing experience. In case you are facing a problem with the TP Link AC750 setup? Then don’t panic! Then you can also get in touch with our experts in case you need additional support for your TP Link.

No comments yet