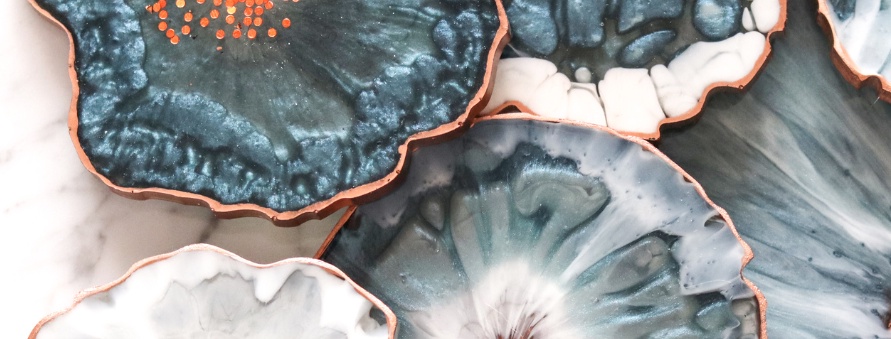
Nothing is more beautiful & decorative than a beautiful coaster. The beautiful coaster adds a touch of elegance to your space. Of course, it is all your home needs. But yeah, this dazzling accessory also needs effort, precision & right raw material. Above all, resin coasters are one of the engaging hobbies that you can develop with your kids or loved ones. There is no need to mention it, but if you are preserving your lovable memories or flowers, you are really always meant to adore them.
So, learn the useful steps to make craft resin coasters.
Step-by-Step Tutorial to Craft Resin Coasters
Follow this step-by-step tutorial to make your craft resin coasters.
Materials Needed:-
|
Step 1: Prepare Your Workspace
Cover your work surface with a plastic sheet or drop cloth to protect it from any spills. Ensure good ventilation in your workspace, as epoxy resin can have strong fumes. Wear disposable gloves to protect your hands during the crafting process.
Step 2: Mix the Resin
Follow the instructions on your epoxy resin kit to mix the resin and hardener in the designated ratio. Use separate cups for resin and hardener, and then combine them in a larger cup. Stir thoroughly but gently to avoid introducing air bubbles into the mixture.
Step 3: Add Color (Optional)
Mix in some pigment or resin dye if you want to add colour to your coasters. To get the desired colour, start with a little and add more. Additionally, you can experiment with mixing other colours to create unique hues.
Step 4: Pour the Resin
Pour the resin mixture into the silicone coaster mould. Fill each cavity to the desired thickness, usually around 1/8 to 1/4 inch. If you're making layered coasters with different colours, allow each layer to cure before adding the next.
Step 5: Add Embellishments (Optional)
This is the creative part! Sprinkle glitter, place dried flowers, or add any other embellishments you desire onto the resin surface. Use a toothpick or a small tool to arrange the embellishments.
Step 6: Remove Bubbles
To eliminate air bubbles trapped in the resin:
- Use a heat gun or a butane torch.
- Pass the heat source gently over the surface and watch the bubbles rise and disappear.
- Be cautious not to overheat or scorch the resin.
Step 7: Cure the Resin
Allow the resin coasters to cure according to the instructions on your kit. This typically takes 24-48 hours. Place the mould in a dust-free and level area during the curing process.
Step 8: Demold the Coasters
Once the resin has fully cured, carefully remove the coasters from the mould. If you encounter any resistance, flex the mould slightly to release the edges. If you use a silicone mould, the coasters should pop out easily.
Step 9: Sand and Finish
Smooth the edges and surfaces of your coasters using sandpaper with varying grits (starting with a lower grit and progressing to a higher one). Wipe away any dust with a clean, damp cloth. You can apply a clear sealant or resin topcoat for added durability and shine.
Step 10: Optional Finishing Touches
Use painter's tape to create clean lines, or add a border to your coasters for a polished look. Apply a thin resin layer over the tape and remove it once it starts to set but is still tacky.
Your custom craft resin coasters are now ready to be enjoyed! Whether you've chosen vibrant colours, added glitter, or incorporated natural elements, these personalized coasters will add a touch of creativity to your home decor.
FloFlo Flowery Can Effortlessly Help You Creating Your Favorite Resin Coaster
FloFlo Flowery has a special fondness for preserving your memories & flowers. They are the ultimate hub for preserving your lovable wedding and occasional & birthday flowers in high-quality resin coasters. At FloFlo Flowery, you can choose your desired resin coaster in your favourite shape, for example, squad, re, rectangle, oval & circle. The best part? You can also choose add-on items like resin cubes, ring holders, & resin cubes.
Mark your visit now!!
It's Time to Know the Additionals………………………………………………………………………………..
Q1:- How much resin do I need for 4 coasters?
Planning to make 4 resin coasters? If yes, you may need to mix all 8 0z. of resin. For one resin coaster, mix 2 oz. If you have only one mould, you can use a UV dryer to speed up drying or do the project over four days.
Q2:- What materials are best for coasters?
Choosing the best material for a coaster is equally important as you invest your Time. From wood to marble, you can choose your favourite one for yourself. If your preference is for something super absorbent, then you can go for cork or felt. On the other hand, if you are considering something that looks more elegant & can easily be kept or cleaned, then you are free to choose the wood, marble, acrylic or leather options.


No comments yet