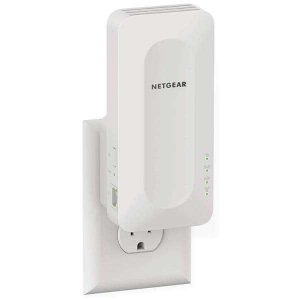
A portable and strong gadget, the Netgear EAX12 WiFi Extender setup is made to improve and expand your current WiFi coverage. Using cutting-edge technology, the Netgear EAX12 Setup eliminates dead zones and offers a seamless WiFi connection across your house or place of business. It also delivers fast and dependable WiFi connections. It is an easy-to-use option for enhancing network performance and guaranteeing a steady connection for all of your devices because of its straightforward setup procedure and compatibility with a wide range of routers. Features like beamforming and MU-MIMO technology are included in the EAX12, which helps to improve wireless connection speed and efficiency.
How Do I Connect with Netgear EAX12 Extender?
The following simple and quick steps are required for the manual setup of the Netgear EAX12 extender:
- Hold it in place against a power outlet while you watch the LED lights stabilize.
- To join the "NETGEAR_EXT" default network, you need a WiFi-capable device. Open the extender's manual and enter the default password.
- On the linked device, use a web browser and type "mywifiext.net setup" into the address box. To view the Netgear EAX12 setup page, press Enter.
- In order to create a Netgear account, adhere to the on-screen directions. Use your login information to access it if you already have one.
- From the list of available networks, choose your current WiFi network, then when prompted, input the network password. Press "Next" to continue.
- Await the extender connecting to your router and applying the settings. After everything is set up, you may move the extender to the perfect spot to get more WiFi coverage.
Netgear EAX12 wifi extender setup via wps button
To use the WPS button to set up the Netgear EAX12 extender, simply follow these simple instructions:
- Verify that the EAX12 extender is connected and powered on.
- To enable WPS, press the extension's WPS button.
- For the following two minutes, push the WPS button on the router to begin using WPS.
- The connection is complete when the WPS LED on the extension turns solid.
- If necessary, relocate the Wi-Fi signal extender inside its coverage range to a more advantageous location.
- Verify that the new WiFi network can be connected to by using your devices.
- At this point, the Netgear EAX12 extender ought to be configured correctly after hitting the WPS button.
Our team of professionals is skilled in quickly resolving any of the above Netgear setup problems.
How to login Netgear AX1600 wifi extender?
You may log in to your Netgear AX1600 extender using the following easy and quick steps:
- Once your device is synchronized with the Netgear AX1600 extender's Wi-Fi network, plug it in.
- Launch the web browser. Launch the web browser on the device that is connected.
- Enter the address here: Press Enter after typing "www.mywifiext.net login" into the browser's address box.
- Access Page Now the login page will appear. Provide information about your login.
- Enter the login credentials for the Netgear extender that you have built or updated.
- Sign in: To view the extension settings and make any necessary adjustments, select "Login."
Firmware update for Netgear EAX12 extender
- Open a web browser on a device that is connected, and type "mywifiext net setup" into the address bar. Press Enter to open the Netgear EAX12 extender's web interface.
- In order to use the web interface, provide your admin credentials. If you haven't done so recently, create an account by following the directions on the page.
- Navigate to the "Settings" or "administration" section to find the firmware update option. Make sure the latest firmware version is installed on the Netgear EAX12 extender.
- If it is available, download the most recent firmware version from the Netgear support page. Save the firmware file to your PC.
- Navigate to the firmware update section of the extender's web interface and choose the option to upload the downloaded firmware file.Follow the on-screen directions to begin the update process.
- Allow the firmware upgrading process to complete. This process may cause the extender to reset. After that, make sure the firmware has been updated to the most recent version using the web interface.

No comments yet