The Wifi Extender Setup Netgear is an easy process designed to extend and boost Wi-Fi coverage. This Wi-Fi range extender will enable the wifi network to cover the entire interior of your home or place of business by eliminating dead spots and enhancing signals. Your Netgear extender can be configured using one of two techniques. Manual is the first, whereas WPS is the second. Both approaches have been covered in this article.
Setup Guide for Netgear Extender
Users should carefully follow these instructions to increase Wi-Fi range using manual Netgear Setup settings:
- Start by turning on the extender and plugging it into a power outlet.
- For optimal signal strength, place the extension close to the router.
- Prepare a computer, tablet, or other smart device.
- To reach the Netgear extender login page, open a web browser and type "mywifiext.net" or "192.168.1.250" into the address bar.
- You must enter your login information, including your username and password, on the Netgear extender login screen.
- To finish the Netgear wifi extender setup procedure, adhere to the on-screen directions.
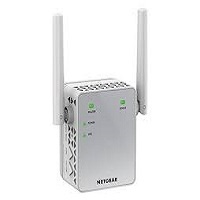
- A successful extender configuration is indicated when all three of the extender's LED lights turn solid green.
The Netgear Extender can be manually configured by users to expand Wi-Fi coverage in their homes or places of business, hence extending the reach of their Wi-Fi network.
Configuring a Netgear Range Extender Using WPS
WPS (Wi-Fi Protected Setup) is one of the fastest methods for configuring the Netgear wifi Extender Setup. If you're confident in setting up a Netgear extender manually, the WPS method offers a speedy setup procedure that takes no more than two minutes to finish.
The instructions for configuring your Netgear extender using WPS are as follows:
- Start by turning on and plugging in your extender to an electrical outlet.
- Make sure your router and the extender are both close to one another and have WPS buttons.
- For a few seconds, press and hold the WPS button on the extension. After a brief delay, the extender's WPS LED will begin to blink.
- Press the WPS button on your WiFi router at the same time.
- Watch for the Netgear Extender configuration to be finished when the WPS LED light on the extender turns solid green.
- Move the extension to a more advantageous spot and make sure it gets a strong signal from the router.
You may easily use the WPS method to join your Netgear Wi-Fi Range Extender to your current Wi-Fi network by following these steps. Don't be afraid to contact our knowledgeable specialists for help if you run into any problems during the setting procedure.
Common Problems with Netgear Wifi Extender Setup
Here are a few common Netgear Extender configuration issues:
- Mywifiext password is incorrect.
- Although the WiFi extension is connected, no internet is available.
- Mywifiext.local cannot be contacted.
- There is no network connection on the WiFi extension.
- The Wavlink extension app will not launch.
- Accessing the 192.168.1.250 IP address has problems.
- CD for configuration lost.
- difficulties with WiFi connectivity.
- The red light on the Wavlink extender is causing problems.
- not being able to reset the extender.
- Despite being connected, the Internet is inoperable.
You can speak with our experienced staff to solve these problems. They'll resolve your problem quickly.
Tips and techniques for fixing Netgear Wifi Extender Setup problems
The Netgear Extender setup issues can be resolved by using the following troubleshooting techniques:
- Verify that the extension is properly turned on.
- In order to access the Netgear extender login page, make sure you are using the appropriate web browser.
- Download and install the most recent extender firmware.
- Try restarting the extender and configuring it from scratch if problems continue.
- For the best signal strength, place the extension close to the router.
- Check that the network of the primary router and the extender are compatible.
- During the setup procedure, double-check and enter the correct login and password.
- Keep the extender away from metal objects that can disrupt the Wi-Fi connection.
- When setting up and connecting, use cables and wires that are in good condition.
You may resolve setup issues and successfully complete the Netgear Wifi Extender setup by following these troubleshooting steps, which will lead to better and more reliable Wi-Fi coverage throughout your house or workplace.
How is the firmware for the Netgear Extender updated?
It's imperative to often update the firmware on your Netgear Extender if you want to take advantage of bug fixes, security updates, and performance improvements. The stability and overall functionality of your extension are guaranteed by maintaining updated firmware.
Follow these instructions to upgrade the firmware on your Netgear Extender Wi-Fi Range Extender:
- Join your computer to the Netgear Extender Extender's network.
- Open a browser and type in the Netgear Extender's default IP address (192.168.1.250) in the address bar.
- Enter your username and password using "admin."
- Select the "Firmware Upgrade" option on the "Administration" screen. Verify if there are any firmware upgrades available.
- If a new firmware version is available, download it now.
- Give the firmware upgrading procedure some time to complete; it can take a while. Keep the extender running during this time.
- Once the firmware upgrade is complete, the Netgear Extender will restart itself.
To confirm that the firmware has been successfully upgraded to the most recent version, visit the device's web interface again and log in.

No comments yet