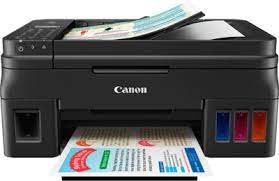
On your Windows or Mac computer, this wikiHow demonstrates how to quickly connect to and set up a Canon wireless printer. You can do this by setting up an Internet connection or by connecting your ij.start.canon to your computer with a USB cord and letting it install and connect on its own.
Things You Should Know
- Use the printer's screen to manually or with WPS connect to your network.
- To add a printer in Windows, go to Printers & Scanners under Settings.
- To add a printer on a Mac, navigate to System Preferences > Printers & Scanners.
Preparing to Install ij start canon
Check to see that your printer is powered on and plugged in. An LED light is generally present on printers to show whether they are turned on. The screen on your printer should also be on.
Step 1
Check to see that your printer is powered on and plugged in. An LED light is generally present on printers to show whether they are turned on. The screen on your printer should also be on.
Stage 2
Verify whether your ij.start.canon setup printer has establishment programming. In the event that your printer accompanied a Compact disc, you can run the establishment program to set up the printer, however most current printers will introduce naturally or the product can be downloaded from the producer's webpage.
- To introduce through a Cd, basically embed the Cd into your PC's Compact disc plate, then adhere to the on-screen directions. For PCs without an implicit Compact disc drive, you'll require an outer Cd peruser to play out this step.
Interface Your Printer by means of WPS
- Tap the organization button on your printer.It ought to show up on the home screen on the printer. It's an "I" with bended lines transmitting from it, with a line striking through the icon.[1]
- This strategy utilizes Wi-Fi Safeguarded Setup (WPS) to associate your printer to your remote organization. This allows you to associate without having to realize your switch name or secret word.
- Connecting utilizing this technique requires a switch that upholds WPS. There will be a committed WPS button on your switch.
- Select Wi-Fi.This opens the "Wi-Fi setting list" menu.
- Select Settings.This is in the "Wi-Fi setting list" menu.
- Select Wi-Fi setup in the "Wi-Fi" menu.
- Select WPS (Press button technique) in the "Wi-Fi setup" menu.
- Select alright.
- Hold down the WPS button on your router.Continue holding the button while playing out the subsequent stage.
- Select alright on your printer screen.You're finished! You've associated your printer to your organization utilizing WPS.
Associate Your Printer Physically
Interface your printer to the Internet.This will ordinarily comprise of utilizing the printer's LCD board to choose a remote organization and enter the secret phrase. This technique will cover the general moves toward associate.
- Check your printer's guidance manual to see explicit directions on associating your printer model to the Web.
- You can track down a web-based adaptation of your printer's guidance manual on Canon's site by clicking Backing, choosing MANUALS in the drop-down menu, clicking Printers, and viewing as your printer's model number.
- Tap the setup button on your printer.This is a symbol with a couple of forceps and a screwdriver.[2]
- Go to Wi-Fi setup.
- Select Manual connect.This is in the "Wi-Fi setup" menu.
- Select your router. Its name will show up in the switch list on the printer.
- Make sure that your PC is on a similar organization as your printer. For your remote printer to get orders from your PC, both your PC and your printer should be associated with a similar Wi-Fi organization.
- Type in your switch secret phrase.
- Press Acceptable for two seconds.
- Press Yes when provoked to "Apply?"the association. You're finished! You've associated your printer to your organization.
- In the event that your printer is associated with an alternate Wi-Fi network than your PC, change your PC's Wi-Fi network prior to continuing.
Introducing ij.start.cannon on Windows
- Launch the Start menu and click the Windows logo in the bottom left corner of the screen.
- Click the Settings gear in the lower-left corner of the window to open Settings.
- Select Gadget. It is located at the very top of the Settings box.
- Select the tab labelled "Printer and Scanner" located on the window's left side.
- At the top of the page, click + Add a printer or scanner. By doing so, a spring-up window is opened.
- Your printer is now connected if you see the name of the printer (for example, "Canon [model number]") in the "Printers and scanners" section.
- Select the name of your printer. It should be in the window that opens. By doing this, you'll cause your PC to communicate with the printer. After the association interaction is complete, you can choose to use the printer connected to your PC.
- If Windows is unable to locate the printer, move on to the following step.
- Discovering an incorrect "disconnected" printer? Consult our advice for the best way to fix that.
- Try connecting the printer to a computer using a USB cable. If your printer wasn't listed in the Add window, you might be able to connect it to your computer using a link to introduce the printer:
- Use a USB-A to USB-B link to connect your printer to your computer. Your PC connects to the rectangular USB-A connector. Because it is more square, the USB-B connector is connected to your printer.
- Have faith that the shop window will open.
- Follow the instructions displayed on-screen.

No comments yet