In the digital age, capturing and sharing moments on your Mac has become an essential skill. Whether you want to document a crucial piece of information or share a memorable moment, knowing how to take a screenshot on your Mac is a valuable skill. In this guide, we'll explore various methods to how to take screenshot on a mac and enhance your overall user experience.
- Using Keyboard Shortcuts
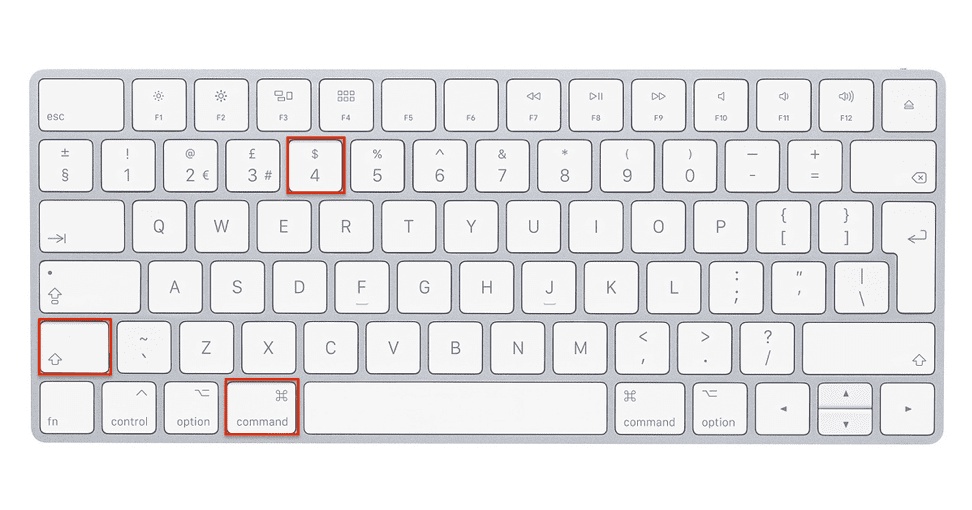
One of the quickest ways to capture your screen on a Mac is by utilizing keyboard shortcuts. Pressing "Command (⌘) + Shift + 3" captures the entire screen, while "Command (⌘) + Shift + 4" allows you to select a specific portion. To capture a specific window, press "Command (⌘) + Shift + 4" followed by the "Spacebar."
- Utilizing Preview
Preview, a versatile built-in application on Mac, also offers screenshot functionality. Open Preview, click on "File," and select "Take Screenshot." From here, you can choose between capturing the entire screen, a selected portion, or a specific window.
- Grab Utility
For a more comprehensive approach, consider using the Grab utility on your Mac. Located in the Utilities folder within the Applications directory, Grab allows you to capture screenshots with precision. Open Grab, select your desired capture mode, and save the screenshot to your preferred location.
- Time-Saving with Command + Control + Shift + 4
A lesser-known but incredibly useful shortcut is "Command (⌘) + Control + Shift + 4." This combination enables you to capture a specific area and copy it directly to the clipboard, saving you time in the process. Simply paste the screenshot into your desired application or document.
- Instant Markup with Shift + Command + 5
For users running macOS Mojave or later, the Shift + Command + 5 shortcut opens the screenshot toolbar. This toolbar not only allows you to capture screenshots but also provides instant access to markup tools for quick edits. This feature is especially handy for those who wish to annotate or highlight specific elements in their screenshots.
Now that you're well-versed in the various methods of capturing screenshots on your Mac, it's essential to optimize your workflow for efficiency. Naming conventions and organized storage are key aspects of an effective screenshot management system.
Organizing Your Screenshots
Create a dedicated folder for your screenshots to maintain order and streamline accessibility. Consider categorizing them further by projects, dates, or content types. This ensures that you can quickly locate specific screenshots when needed.
Utilizing Descriptive File Names
Give your screenshots descriptive names to easily identify their content. This practice not only enhances searchability but also helps you recall the context of each screenshot without opening it. For instance, "WebsiteHomepage_Screenshot_Date" provides clear information about the captured content.
Regularly Reviewing and Deleting Unnecessary Screenshots
Periodically review your screenshot folder to identify and delete any unnecessary or outdated captures. This proactive approach prevents clutter and ensures that your storage space is efficiently utilized.
In conclusion, mastering how to take a screenshot on a Mac is a fundamental skill that enhances your productivity and communication. By utilizing keyboard shortcuts, built-in applications like Preview and Grab, and leveraging advanced features introduced in recent macOS versions, you can efficiently capture and manage screenshots. Remember to optimize your workflow by organizing, naming, and regularly reviewing your screenshots, ensuring a seamless and efficient user experience on your Mac.

No comments yet