Taking screenshots is a daily need these days as we often come across screens that we wish to revisit again for some reference. Taking a screenshot is not a tricky task however when you need to edit a screenshot, you may need to use different tools to meet the requirements. There are different inbuilt features to take a screenshot on Windows PC.
This article on how to take a screenshot on Windows 11 will explore all the manual and automated methods to take a screenshot. You will also explore how to edit screenshots, save them, and share them on different portals. Let us explore the manual tricks to screenshots on Windows.
How to Take a Screenshot on PC
There are different ways to take screenshots on Windows. Here are a few basic and advanced methods to screenshot on Windows.
Screenshot on Windows Using Print Screen (PrtScn) Key
You can use the Print Screen option to capture the Full-Screen screenshot.
Step 1. Open the content that you wish to capture.
Step 2. Press the ‘Print Screen’ (PrtScn) key on the top right of the keyboard.
Step 3. It will capture the entire screen (Full Screen) and keep a copy on your clipboard.
Step 4. Access the app where you wish to paste it like MS Paint, MS Word, or Photoshop. Press Ctrl + V to paste it into your opened app and save the screenshot.
Screenshot on Windows Using Alt + Print Screen Keys
Alt + Print Screen Keys are used to capture a screenshot of the active window on the screen.
Step 1. Open the content that you wish to capture.
Step 2. Click on the window to keep it the active window.
Step 3. Press the Alt key + Print Screen key to capture the screenshot of the active window.
Step 4. Access the app where you wish to paste it like MS Paint, MS Word, or Photoshop. Press Ctrl + V to paste it into the app you opened and save the screenshot.
Take Screenshot Using Windows + Shift + S Keys
Use Windows + Shift + S keys to drag and capture a screenshot of the selected area on Windows.
Step 1. Open the content that you wish to capture.
Step 2. Press Win + Shift + S keys together to change the pointer to + sign.
Step 3. Drag the area that you wish to capture on your clipboard.
Step 4. After selecting the area, the screenshot will be copied on your clipboard.
Step 5. Access the app where you wish to paste it like MS Paint, MS Word, or Photoshop. Press Ctrl + V to paste it into your opened app and save the screenshot.
Use Snipping Tool to Screenshot on Windows
Windows 10 & 11 comes with a Snip & Sketch utility to take and edit screenshots.
Step 1. Open the content that you wish to capture.
Step 2. Press the Win key and search for the ‘Snipping Tool’ app.
Step 3. Click on the "Snipping Tool" or "Snip & Sketch" from the search results. This is similar to using the (Win + Shift + S) keys on the keyboard.
Step 4. Select the mode you wish to use to capture the screenshot on Windows. You can select between a rectangular mode, window mode, full-screen mode, and free-form mode.
Step 5. After capturing the screenshot, access the app where you wish to paste it like MS Paint, MS Word, or Photoshop. Press Ctrl + V to paste it into the app you opened and save the screenshot.
Take Screenshot Using Windows + PrtScn Keys
Windows 8 & above versions can capture and save the screenshot directly in the Photos library.
Step 1. Open the content that you wish to capture.
Step 2. Press the Win + PrtScn key to capture the screenshot of the entire screen and save it directly to the Pictures Album.
Step 3. You can access the Pictures album in Windows Explorer (Win + E), go to the Screenshots folder and find the capture saved as an image.
Take Screenshots Using the Game Bar
Windows 10 and above versions have this feature to take screenshots using the Xbox Game Bar.
Step 1. Press Win + G and the Gamebar window will appear.
Step 2. If you can’t see the Game Bar, you will need to enable this option in the Gaming Settings (Win + I) in Windows.
Step 3. Click on the Camera icon in the Captures panel on the top left.
Step 4. After capturing the screenshot, access the app where you wish to paste it like MS Paint, MS Word, or Photoshop. Press Ctrl + V to paste it into your opened app and save the screenshot.
Use Third-Party Screenshot Utility
There are several third-party utilities available to take screenshots, edit images, and save or share them on different portals.
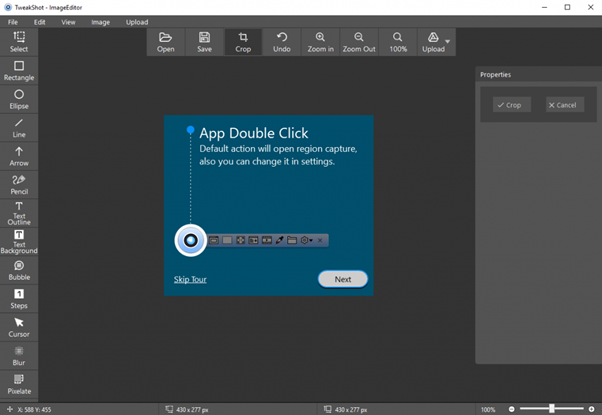
TweakShot Screen Capture

TweakShot Screen Capture is one of the best utilities to capture your screen, edit images, and share them on social media. It is compatible with Windows 11 and earlier versions of Windows. You can capture an active window, drag to capture, capture full-screen, capture scrolling windows, or record a video. It has an inbuilt image editor to add edit or personalize screenshots with watermarks.
Final Words
This article on how to screenshot on Windows has the best tips and tricks to screenshot on Windows. There are different inbuilt methods to take a screenshot on a PC and edit them. You can capture screenshots, personalize them and share them on different social media platforms. You can use TweakShot Screen Capture to add a professional touch to the screen captures.

No comments yet