An existing Wi-Fi network can have its coverage and power increased by using a range extender, such the Wavlink HD4 outdoor Extender Setup AC1200. It serves as a bridge between your router and gadgets placed in places where Wi-Fi signals are poor. The wireless signal from your router is picked up by the range extender and transmitted again, expanding the network's coverage to previously unreachable places.
You connect your PC or mobile device to the range extender's network during Wavlink HD4 outdoor Extender Setup AC1200 and use a web browser to view the configuration interface. You can connect the range extender to your current Wi-Fi network using this interface, change settings, and personalize features to enhance the functionality of the extended network.
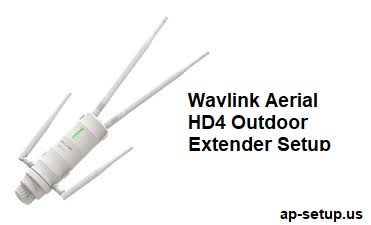
Wavlink Aerial HD4 outdoor extender manual setup
The Wavlink HD4 outdoor Extender Setup AC1200 can be done in the following stages, which are simplified:
- Choose a place for the range extender that is within the coverage area of your current Wi-Fi network.
- Utilize the supplied adaptor to connect the range extender to a power source.
- Use the provided default password to join the Wi-Fi network "Wavlink-XXXX" on your computer or mobile device. XXXX stands for a special identification.
- Launch a web browser and type the range extender's default IP address such as 192.168.10.1 into the address bar.
- To enter the setup interface, type the default login information (username and password).
- To configure the range extender, follow the on-screen instructions. This includes selecting your current Wi-Fi network from a list and inputting the password.
- As the range extender reboots, save the settings.
- Reconnect to your primary Wi-Fi network after disconnecting from the "Wavlink-XXXX" network.
- By going to locations with poor Wi-Fi coverage and testing for stronger signal levels, you can test the expanded network.
An overview of the setup procedure is given in these steps. Please consult the user manual or documentation specifically for your Wavlink Aerial HD4 model for further in-depth instructions or any other advanced settings.
Wavlink Aerial HD4 Extender Setup via WPS method
Use these instructions for the Wavlink HD4 outdoor Extender Setup AC1200 through WPS (Wi-Fi Protected Setup):
- Select an appropriate place for the outdoor extender, making sure it has a direct line of sight to the router of your current Wi-Fi network.
- Connect the included power adapter to the outside extender and plug it into a power source to turn on the outdoor extension. Set the outdoor extender to on.
- Locate the WPS button on your router, and then press it. Hold down the WPS button while pressing it until the WPS LED begins to flash.
- Press the WPS button on the outdoor extender within two minutes of pushing the WPS button on your router. The external extender's WPS LED will begin to blink.
- A WPS connection will now be made by the outdoor extension with your router. Await the connection. When the connection is successful, the WPS LED on the external extension will stay lit.
- Go to a location where Wi-Fi signal strength was previously poor, and see if it has improved.
- Make sure your gadgets can access the internet effectively by connecting them to the extended network.
By immediately configuring the connection between the outdoor extender and your current Wi-Fi network, using the WPS technique streamlines the Wavlink HD4 outdoor Extender Setup AC1200 procedure. It's crucial to remember that not all routers and range extenders support WPS, though. Before utilizing this method, you might additionally need to enable WPS in the router's settings on some routers.
The manual setup technique described in the previous response can be used if the WPS method fails or is unavailable. You can also refer to the user manual or other specialized literature included with the Wavlink Aerial HD4 outside extension for more help.
Common Issues that occurs during the setup process
Some typical problems that may arise during the Wavlink HD4 outdoor Extender Setup AC1200
include:
- Wi-Fi signal that is too weak or unstable: If the Wi-Fi signal is too weak or unstable, the range extender might be unable to connect to the current Wi-Fi network.
- Misplaced: If the range extender is not placed correctly, the Wi-Fi signal may not be extended as intended.
- Incorrect login information: Entering the setup interface for the range extender with the wrong username and password may prohibit you from correctly configuring it.
- Incompatible settings: Devices may have problems connecting to the extended network if the range extender's settings, such as the Wi-Fi network name (SSID) or password, are not correctly configured to match your existing Wi-Fi network.
- Issues with the range extender's firmware: Outdated firmware can make it incompatible and make setup difficult.
- Interference: The signal from the range extender may be interfered with by other Wi-Fi networks or other electronic devices using the same or adjacent channels, resulting in poor performance or connectivity issues.
- Problems with the power supply: The functionality of the range extender may be hampered by using an incompatible power adapter or an inadequate power source.
If you experience any of these problems while setting up your device, consult the user manual or other relevant materials for troubleshooting advice. You can also get help from the manufacturer's support team.

No comments yet