Are you interested in learning the Wavlink AC600 Setup device? You can set up your wavlink AC600 using the easy instructions provided below. One of the best ways to improve your connectivity has long been using WiFi adapters. WiFi is often just used indoors, but if your property is larger, you could wish to expand it outside as well.
In such cases, the best choice should be suitable WiFi adapters. A good choice to consider would be a WiFi adapter that is waterproof or weatherproof. The Wavlink AC600 WiFi adapter is a great option if you find yourself in this situation.
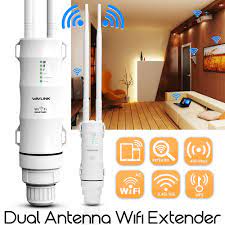
Installation of wavlink ac600 extender
The following techniques can be used to complete the wavlink ac600 installation on Internet Explorer.
- Unpack and manage your device.
- Connect the AC600 to an electrical outlet.
- Remove all smart devices from the area.
- Set your device's internet connection to "on."
- choose a web browser
- Enter 192.168.10.1 or ap.setup in the address bar.
- then type your admin username and password.
- To get started, click the Login button.
- Follow the on-screen instructions to setup your Wavlink AC600 extender.
Note:- If you need any help regarding your wavlink ac600 extender so contact our technician or visit the official website that is ap wifi range extender setup.
Wavlink AC600 setup using web browser
Follow these instructions to setup a Wavlink AC600 using a web browser:
- Start your computer's web browser to get started.
- Then, enter 192.168.2.1 or ap:setup in the address bar of your browser.
- You must first log in using your username and password to access your extender panel.
- Next, choose the advanced option from the drop-down box on the extender login screen.
- Your screen will display a tab for extender information, and you must choose the option to restore factory default settings from there.
- The reset of your extender has now been successfully done.
How can i setup wavlink ac600 extender via wps button
- On the back of your extender, look for the WPS button.
- To make it discoverable by other devices, press the WPS button.
- After two to three minutes, turn on your range extender and push the WPS button.
- Watch for the LED indication on the extender to turn completely blue.
- This shows that the WPS connection was finally created.
- The Range Extender will now begin to look for an open network.
- Press the Connect button after choosing the proper wireless network from the list.
- The Wavlink AC600 setup is now finished.
Updated firmware for the Wavlink AC600
firmware is a combination of hardware and software. It is built into your Wavlink AC600 and gives you a number of options for how to utilise your extender. Updating your firmware is essential since it gives you access to updated security packs and other features that were missing from the previous version. It also helps with bug fixes and other problems that you could run into when using this extender.
- Start the Wavlink AC600.
- Pick any smart device.
- Access Ap.setup.
- After selecting settings, hit on firmware update.
- Follow the instructions to complete the firmware upgrade process.
- Don't disconnect the booster during the one-minute wait.
- This is how to upgrade the Wavlink AC600's firmware.

No comments yet