Do you want to know how to set up the Wavlink AC600 device? The simple instructions below will guide you through the wavlink AC600 setup process. WiFi adapters have long been one of the most effective methods of increasing your connectivity. WiFi is primarily used for inside service, but if you have a larger property, you may want to extend it outside as well.
In such instances, suitable WiFi adapters should be an ideal option. A weatherproof or waterproof WiFi adapter would be an excellent option to investigate. If you find yourself in this circumstance, the Wavlink AC600 WiFi adapter can be an excellent choice.
Before you can install and configure your Wavlink AC600, you must first complete the hardware installation. To the letter, follow the hardware installation instructions. After that is finished, you can go to the next stage. Wavlink provides you with a variety of WiFi adapter alternatives. Dual band WiFi USB adapter and Dual band USB wireless network adapter are two of the AC600 WiFi adapter alternatives available from Wavlink. Various antenna configurations are available, including high gain antennas, internal proprietary antennas, and high gain antennas.
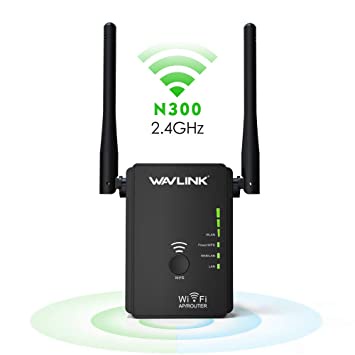
We'll look at the AC600 Dual-band High Power Outdoor Wireless AP/Range Extender/Router with PoE and High Gain Antennas for the purposes of this discussion. What makes it one of the best possibilities is the fact that it is entirely waterproof and weatherproof. IEEE 802.11 ac/a/b/g/n standards are provided by the adapter. On the 2.4 GHz band, rates of 150 Mbps are available, while on the 5 GHz band, speeds of 433 Mbps are available.
You can count on outstanding performance in a variety of outdoor applications. It may be an excellent performer in small workplaces, offices, and even your house without the requirement for exterior networking. With the industry's best hardware, you can expect exceptional performance. It would be one of the best possibilities because of its high-end adaptability. You can count on outstanding performance in a variety of outdoor applications. It may be an excellent performer in small workplaces, offices, and even your house without the requirement for exterior networking. With the industry's best hardware, you can expect exceptional performance. It would be one of the best possibilities because of its high-end adaptability.
You will have access to cutting-edge WiFi technology. With the twin bands, you should be able to connect to many devices at once. The adapter is a good choice for HD streaming, online gaming, and any other highly taxing work that requires a large amount of bandwidth. The Wavlink AC600 WiFi adapters have built-in high amplifiers, which should be one of its best qualities. You'll have access to a five-fold increase in transmission speed. You'll notice that, in addition to increasing transmission strength, the signal reception is enough.
Here are the steps to complete the Wavlink AC600:
-
To log in to WavlinkAC600, follow the instructions outlined above.
-
Check that the Wavlink router is operational. You must first connect to the Wavlink router's network in order to access its setup page. As a result, connect to its network using an Ethernet or Wi-Fi connection.
-
If you don't have the username and password for your Wavlink router's wireless network, you can connect to it through Ethernet. A password will not be required.
-
Then, on your computer, launch a web browser and navigate to the address bar. To access your Wavlink router's web interface, enter "192.168.10.1" and press Enter on your keyboard.
-
Following that, you'll be asked to input your login details. In the right locations.
How to do Wavlink AC600 setup through wps method
-
On the back of your router, look for the WPS button.
-
Press the WPS button to make it discoverable by other devices.
-
Turn on your Range Extender and press the WPS button after 2 - 3 minutes.
-
Wait a few moments for the router's LED indicator to turn solid blue. This indicates that the WPS connection has been created successfully.
-
The Range Extender will now start scanning for a network that is open.
-
After selecting the appropriate wireless network from the list, hit on the Connect button.
-
You have now completed the Wavlink AC600 configuration.
Wavlink AC600 firmware update
Firmware is actually a hybrid of hardware and software. It is included inside your Wavlink AC600 allowing you to use your extender in a variety of ways. It is critical to maintain your firmware up to date since it contains new security packs and other features that you did not have in the previous version, and it also aids in the resolution of bugs and other issues that you may encounter while using this extension.
-
Power on your Wavlink AC600.
-
Take any mobile device.
-
Go to Ap.setup.
-
Hit on settings and then tap on firmware upgrade.
-
To finish the firmware update operation follow the prompts.
-
It will take a minute meanwhile do not unplug the booster.
That’s how you can update the firmware on your Wavlink AC600.
How to reset your Wavlink extender | AC600
Follow the steps given above to Reset WavlinkAC600:
-
To begin, connect your computer to the Wavlink router using an Ethernet wire.
-
Then seek for the reset button on the back of your Wavlink.
-
Press and hold the reset button on the back panel to reset the router.
-
To reset your Wavlink, insert a sharp paper clip, pin, or other thin object into the reset button hole.
-
Insert the Wavlink device after 10-15 seconds of holding the reset button till the LED flashes.
-
When the reset operation is complete, check the LED status of your Wavlink device.
How to configure Wavlink AC600 via web browser setup
To configure Wavlink AC600 via web browser setup go through these steps:
-
To begin, launch your web browser on your computer.
-
Then, in your browser's address bar, type http://ap:setup or http://192.168.2.1.
-
To obtain access to your router's dashboard, firstly you will have to log in with your login and password.
-
Then, on the router's login screen, select the advanced option from the drop-down box.
-
A router information tab will show on your screen, from which you must select the factory default setting reset option.
-
Your router's reset has now been completed successfully.

No comments yet